在使用 Spring Boot 开发项目时,不可避免遇到开发的项目在本地开发环境没有任何问题,但是在提交测试后会出现各种问题。此时,为了分析问题原因,最好的办法就是进行远程调试。下面将介绍怎样开启 Spring Boot 的远程调试。
开启远程调试
假如我们有一个 Spring Boot 包,名为 springboot_hello_world-0.0.1-SNAPSHOT.jar,运行下面命令启动 Spring Boot 项目:
java -Xdebug -Xrunjdwp:transport=dt_socket,server=y,suspend=n,address=58080 -jar springboot_hello_world-0.0.1-SNAPSHOT.jar
上面命令将在 58080 端口上面开启调试功能,启动日志:
C:\Users\Administrator\Desktop>java -Xdebug -Xrunjdwp:transport=dt_socket,server=y,suspend=n,address=58080 -jar springboot_hello_world-0.0.1-SNAPSHOT.jar
Listening for transport dt_socket at address: 58080
  .   ____          _            __ _ _
 /\\ / ___'_ __ _ _(_)_ __  __ _ \ \ \ \
( ( )\___ | '_ | '_| | '_ \/ _` | \ \ \ \
 \\/  ___)| |_)| | | | | || (_| |  ) ) ) )
  '  |____| .__|_| |_|_| |_\__, | / / / /
 =========|_|==============|___/=/_/_/_/
 :: Spring Boot ::        (v2.3.1.RELEASE)
2022-11-04 10:35:15.481  INFO 16628 --- [           main] c.h.hello_world.HelloWorldApplication    : Starting HelloWorldApplication v0.0.1-SNAPSHOT on hxstrive with PID 16628 (C:\Users\Administrator\Desktop\springboot_hello_world-0.0.1-SNAPSHOT.jar started by Administrator in C:\Users\Administrator\Desktop)
2022-11-04 10:35:15.489  INFO 16628 --- [           main] c.h.hello_world.HelloWorldApplication    : No active profile set, falling back to default profiles: default
2022-11-04 10:35:17.693  INFO 16628 --- [           main] c.MyPropertySourcesPlaceholderConfigurer : Config file does not exist. path=D:\application.properties
2022-11-04 10:35:18.819  INFO 16628 --- [           main] o.s.b.w.embedded.tomcat.TomcatWebServer  : Tomcat initialized with port(s): 8080 (http)
2022-11-04 10:35:18.856  INFO 16628 --- [           main] o.apache.catalina.core.StandardService   : Starting service [Tomcat]
2022-11-04 10:35:18.857  INFO 16628 --- [           main] org.apache.catalina.core.StandardEngine  : Starting Servlet engine: [Apache Tomcat/9.0.36]
2022-11-04 10:35:19.079  INFO 16628 --- [           main] o.a.c.c.C.[Tomcat].[localhost].[/]       : Initializing Spring embedded WebApplicationContext
2022-11-04 10:35:19.079  INFO 16628 --- [           main] w.s.c.ServletWebServerApplicationContext : Root WebApplicationContext: initialization completed in 3415 ms
2022-11-04 10:35:19.593  INFO 16628 --- [           main] o.s.s.concurrent.ThreadPoolTaskExecutor  : Initializing ExecutorService 'applicationTaskExecutor'
2022-11-04 10:35:20.111  INFO 16628 --- [           main] o.s.b.w.embedded.tomcat.TomcatWebServer  : Tomcat started on port(s): 8080 (http) with context path ''
2022-11-04 10:35:20.139  INFO 16628 --- [           main] c.h.hello_world.HelloWorldApplication    : Started HelloWorldApplication in 6.363 seconds (JVM running for 7.967)
springboot广告位
连接远程调试
下面将介绍如何利用 IDEA 进行远程调试,具体步骤如下:
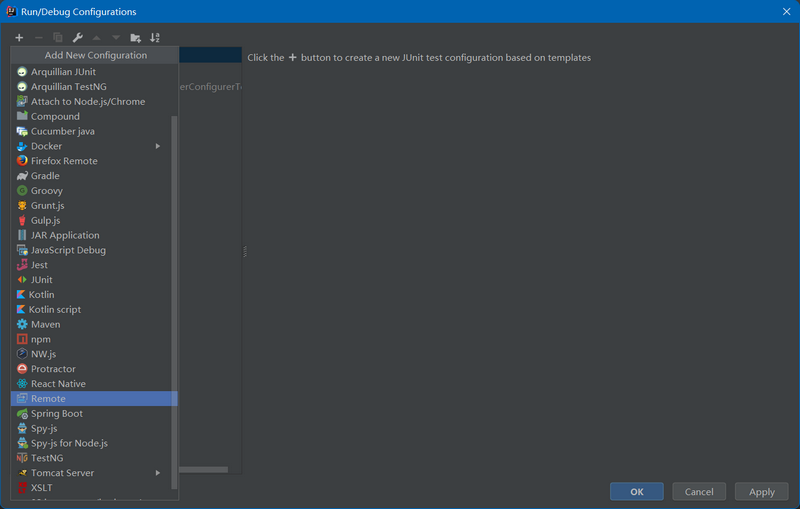
(1)打开 IDEA 的 Run/Debug 配置页面,并且创建一个 Remote。如下图:
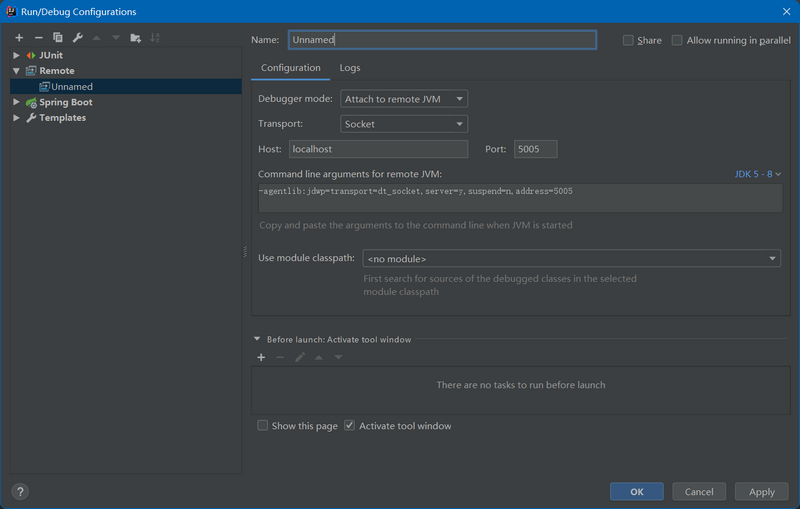
(2)创建的 remote 如下,需要用户填写名称、主机地址、端口等信息,如下图:
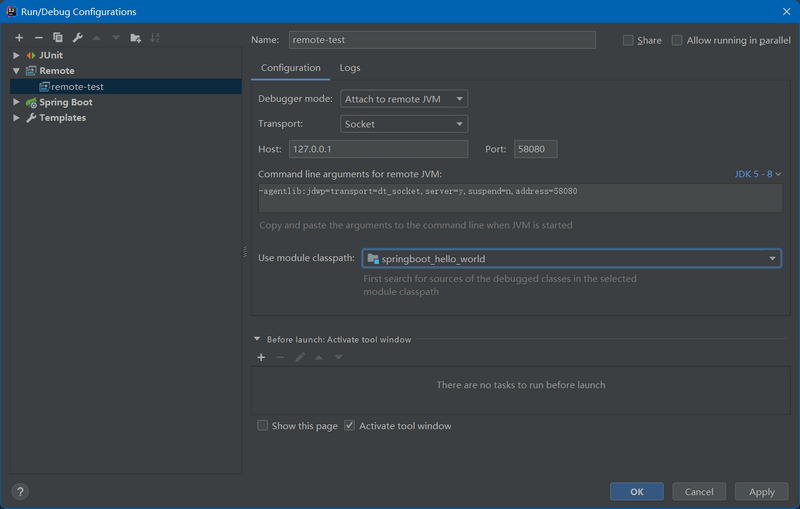
(3)将 host 设置为 127.0.0.1,port 设置为 58080,并且选择要调试 springboot_hello_world 模块,保存配置信息,如下图:
(4)在 IDEA 的主页界面选择“remote-test”配置,然后点击“debug”按钮运行远程调试。如下图:

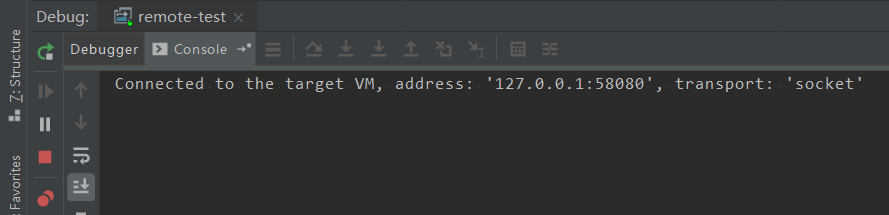
(5)如果成功链接到远程 Spring Boot 调试服务,显示如下图:
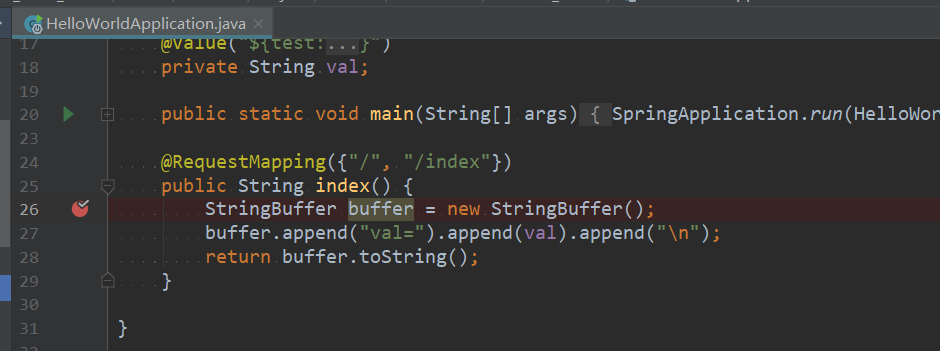
(6)在人一个代码中打一个断点,如下图:
(7)使用浏览器访问:http://localhost:8080
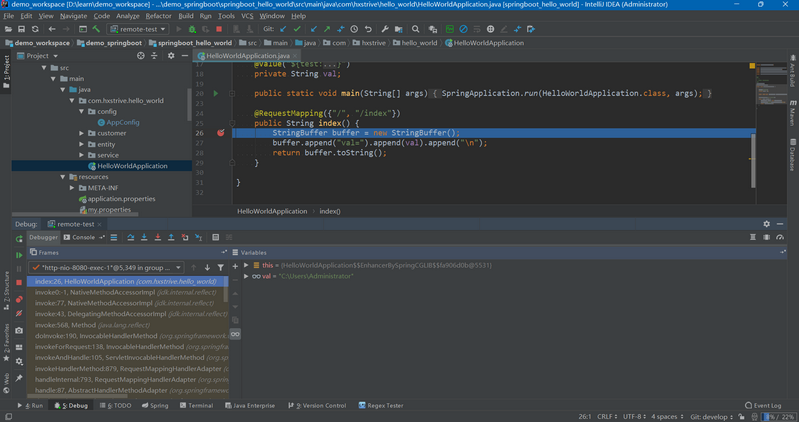
(8)此时,IDEA 自动进入调试模式,此时就可以开始远程调试了。如下图:
生活总会给你答案的,但不会马上把一切都告诉你。只要你肯等一等,生活的美好,总在你不经意的时候,盛装莅临。


 川公网安备51010802032098