本文将介绍怎样在 CentOS 7 中安装免安装的 mysql 5.7
本文将介绍在 Centos7 版本中安装 MySQL 免安装版本。
下载安装包
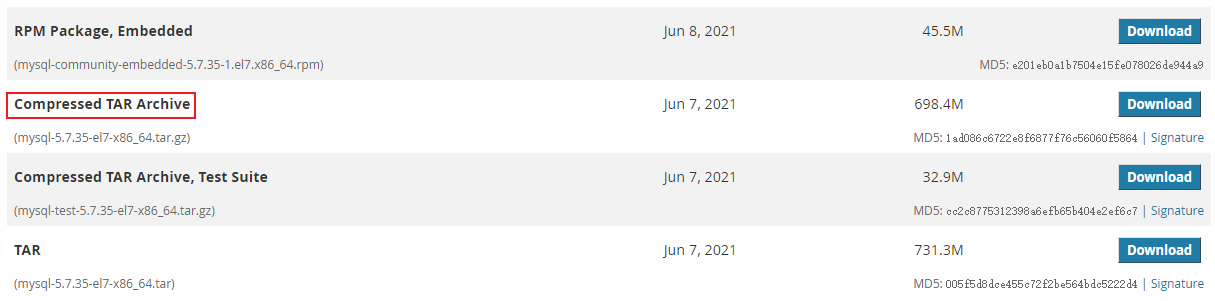
使用浏览器访问 mysql 官网,获取 mysql 安装包的下载地址:
https://cdn.mysql.com/archives/mysql-5.7/mysql-5.7.35-el7-x86_64.tar.gz
(1)使用 wget 命令下载,如下:
[root@localhost ~]# wget https://cdn.mysql.com/archives/mysql-5.7/mysql-5.7.35-el7-x86_64.tar.gz
--2021-11-05 13:01:34--  https://cdn.mysql.com/archives/mysql-5.7/mysql-5.7.35-el7-x86_64.tar.gz
Resolving cdn.mysql.com (cdn.mysql.com)... 104.107.242.188
Connecting to cdn.mysql.com (cdn.mysql.com)|104.107.242.188|:443... connected.
HTTP request sent, awaiting response... 200 OK
Length: 732374542 (698M) [application/x-tar-gz]
Saving to: ‘mysql-5.7.35-el7-x86_64.tar.gz.1’

100%[======================================>] 732,374,542 3.34MB/s   in 3m 21s

2021-11-05 13:04:56 (3.47 MB/s) - ‘mysql-5.7.35-el7-x86_64.tar.gz’ saved [732374542/732374542]
注意:mysql 安装包大小为 600+MB,需要等待一会儿。
(2)成功下载 mysql 安装包后,使用 tar 命令解压安装包,如下:
[root@localhost ~]# tar -xvzf mysql-5.7.35-el7-x86_64.tar.gz
mysql-5.7.35-el7-x86_64/bin/myisam_ftdump
...
mysql-5.7.35-el7-x86_64/docs/INFO_BIN
mysql-5.7.35-el7-x86_64/docs/INFO_SRC
(3)使用 mv 命令将解压后的目录重命名为 “mysql”,如下:
[root@localhost ~]# mv mysql-5.7.35-el7-x86_64 mysql
(4)使用 mv 命令将重命名后的 mysql 移动到 /usr/local/ 目录,如下:
[root@localhost ~]# sudo mv mysql /usr/local/
[root@localhost ~]# ls /usr/local/mysql/
bin  docs  include  lib  LICENSE  man  README  share  support-files
配置 mysql
(1)配置 my.cnf 文件,将 mysql 的 support-files 目录下的 my.cnf 文件复制到 /etc/my.cnf。mysql 5.7 之后support-files 目录下没有 my.cnf 文件,所以直接创建 /etc/my.cnf 文件。my.cnf 文件内容如下:
[mysqld]
basedir=/usr/local/mysql
datadir=/usr/local/mysql/data
socket=/usr/local/mysql/mysql.sock

# Disabling symbolic-links is recommended to prevent assorted security risks
symbolic-links=0

# Settings user and group are ignored when systemd is used.
# If you need to run mysqld under a different user or group,
# customize your systemd unit file for mariadb according to the
# instructions in http://fedoraproject.org/wiki/Systemd

[mysqld_safe]
log-error=/var/log/error.log
pid-file=/usr/local/mysql/data/mysqld.pid

[client]
socket=/usr/local/mysql/mysql.sock
default-character-set=utf8
(2)创建 mysql 数据目录,如下:
[root@localhost ~]# cd /usr/local/
[root@localhost local]# mkdir data
[root@localhost local]# ll
total 0
drwxr-xr-x.  2 root root   6 Apr 11  2018 bin
drwxr-xr-x.  2 root root   6 Nov  5 13:18 data
drwxr-xr-x.  2 root root   6 Apr 11  2018 etc
drwxr-xr-x.  2 root root   6 Apr 11  2018 games
drwxr-xr-x.  2 root root   6 Apr 11  2018 include
drwxr-xr-x.  2 root root   6 Apr 11  2018 lib
drwxr-xr-x.  2 root root   6 Apr 11  2018 lib64
drwxr-xr-x.  2 root root   6 Apr 11  2018 libexec
drwxr-xr-x. 11 root root 151 Oct  1 06:53 nginx
drwxr-xr-x.  2 root root   6 Apr 11  2018 sbin
drwxr-xr-x.  5 root root  49 Aug  3 01:28 share
drwxr-xr-x.  2 root root   6 Apr 11  2018 src
(3)出于安全和便利,创建一个专门操作数据库的用户。如下:
a、建立一个 mysql 组
[root@localhost mysql]# groupadd mysql
b、建立 mysql 用户,并且把用户放到 mysql 组
[root@localhost mysql]# useradd -r -g mysql mysql
c、将目录 /usr/local/mysql 拥有者改为 mysql
[root@localhost mysql]# chown -R mysql:mysql /usr/local/mysql/
[root@localhost mysql]# ll
total 272
drwxr-xr-x.  2 mysql mysql   4096 Nov  5 13:00 bin
drwxr-xr-x.  2 mysql mysql      6 Nov  5 13:22 data
drwxr-xr-x.  2 mysql mysql     55 Nov  5 13:00 docs
drwxr-xr-x.  3 mysql mysql   4096 Nov  5 12:59 include
drwxr-xr-x.  5 mysql mysql    230 Nov  5 13:00 lib
-rw-r--r--.  1 mysql mysql 259200 Jun  7 20:52 LICENSE
drwxr-xr-x.  4 mysql mysql     30 Nov  5 13:00 man
-rw-r--r--.  1 mysql mysql    566 Jun  7 20:52 README
drwxr-xr-x. 28 mysql mysql   4096 Nov  5 13:00 share
drwxr-xr-x.  2 mysql mysql     90 Nov  5 13:00 support-files
mysql广告位
初始化 mysql
使用 mysql 的 “mysqld --initialize” 命令初始化 mysql 数据库,如下:
[root@localhost bin]# ./mysqld --initialize --user=mysql --basedir=/usr/local/mysql --datadir=/usr/local/mysql/data
2021-11-05T05:24:20.044232Z 0 [Warning] TIMESTAMP with implicit DEFAULT value is deprecated. Please use --explicit_defaults_for_timestamp server option (see documentation for more details).
2021-11-05T05:24:20.248550Z 0 [Warning] InnoDB: New log files created, LSN=45790
2021-11-05T05:24:20.286955Z 0 [Warning] InnoDB: Creating foreign key constraint system tables.
2021-11-05T05:24:20.348752Z 0 [Warning] No existing UUID has been found, so we assume that this is the first time that this server has been started. Generating a new UUID: a0f8d057-3df8-11ec-b3cb-000c29633905.
2021-11-05T05:24:20.349623Z 0 [Warning] Gtid table is not ready to be used. Table 'mysql.gtid_executed' cannot be opened.
2021-11-05T05:24:21.488386Z 0 [Warning] A deprecated TLS version TLSv1 is enabled. Please use TLSv1.2 or higher.
2021-11-05T05:24:21.488406Z 0 [Warning] A deprecated TLS version TLSv1.1 is enabled. Please use TLSv1.2 or higher.
2021-11-05T05:24:21.489119Z 0 [Warning] CA certificate ca.pem is self signed.
2021-11-05T05:24:21.778522Z 1 [Note] A temporary password is generated for root@localhost: 0hrhgOkuq1%1
注意:上面初始化 mysql 最后输出的 “0hrhgOkuq1%1” 为 mysql 默认密码。
启动 mysql
[root@localhost bin]# ./mysqld_safe --user=mysql &
[1] 23488
2021-11-05T05:26:38.297282Z mysqld_safe Logging to '/var/log/error.log'.
2021-11-05T05:26:38.352368Z mysqld_safe Starting mysqld daemon with databases from /usr/local/mysql/data
验证 mysql
(1)使用 mysql 客户端工具连接到 mysql 客户端(这里使用上面初始化 mysql 生成的密码 0hrhgOkuq1%1),如下:
[root@localhost bin]# ./mysql -uroot -p
Enter password:
Welcome to the MySQL monitor.  Commands end with ; or \g.
Your MySQL connection id is 2
Server version: 5.7.35

Copyright (c) 2000, 2021, Oracle and/or its affiliates.

Oracle is a registered trademark of Oracle Corporation and/or its
affiliates. Other names may be trademarks of their respective
owners.

Type 'help;' or '\h' for help. Type '\c' to clear the current input statement.

mysql>
(2)初次登录 mysql 需要修改密码,如下:
mysql> set password=password('aaaaaa');
Query OK, 0 rows affected, 1 warning (0.00 sec)
(3)演示 mysql 的 show、use、select 语句,如下:
mysql> show databases;
+--------------------+
| Database           |
+--------------------+
| information_schema |
| mysql              |
| performance_schema |
| sys                |
+--------------------+
4 rows in set (0.00 sec)

mysql> use mysql;
Reading table information for completion of table and column names
You can turn off this feature to get a quicker startup with -A

Database changed

mysql> use mysql
Database changed

mysql> select Host,User from user;
+-----------+---------------+
| Host      | User          |
+-----------+---------------+
| localhost | mysql.session |
| localhost | mysql.sys     |
| localhost | root          |
+-----------+---------------+
3 rows in set (0.00 sec)


 川公网安备51010802032098