本章节将介绍怎样将 FreeMarker 和 Spring Boot 进行集成,Spring Boot 利用 FreeMarker 来开发前端界面。
创建 Spring Boot 项目
创建 Spring Boot 项目的方法很多,这里将介绍怎样利用 IDEA 快速创建 Spring Boot 项目。步骤如下:
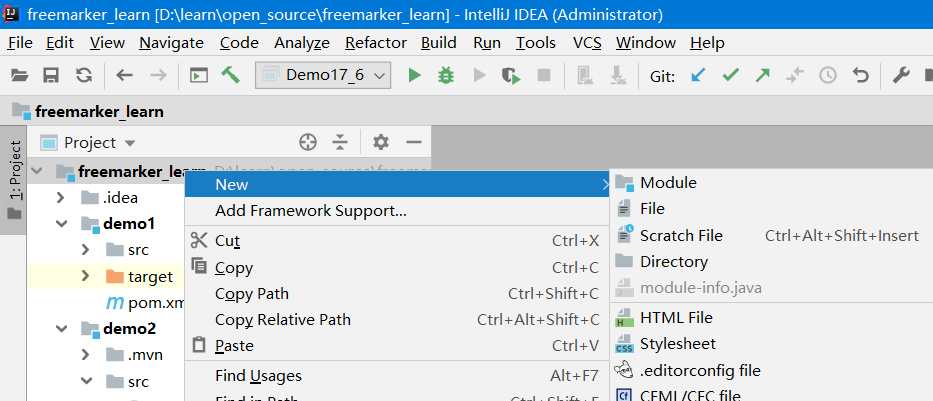
(1)选中我们的项目(这里提前创建了一个 maven 的 pom 项目,下面将创建一个模块)右击,选择“New”、“Module”。如下图:
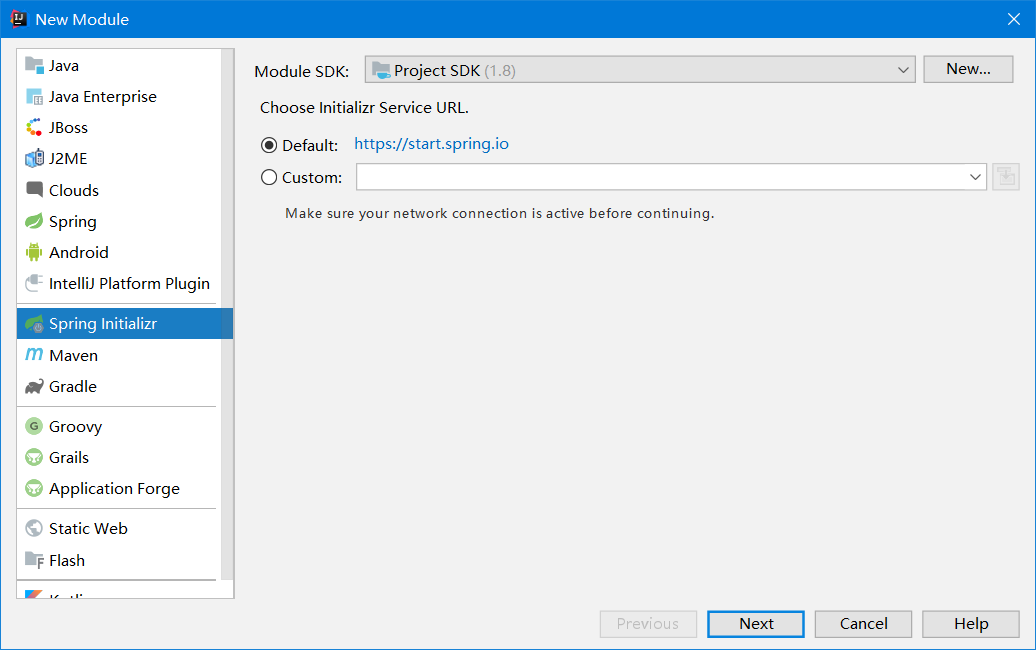
(2)选择“Spring Initializr”,默认将使用“https://start.spring.io”地址加载 Spring Boot 的依赖组件。如下图:
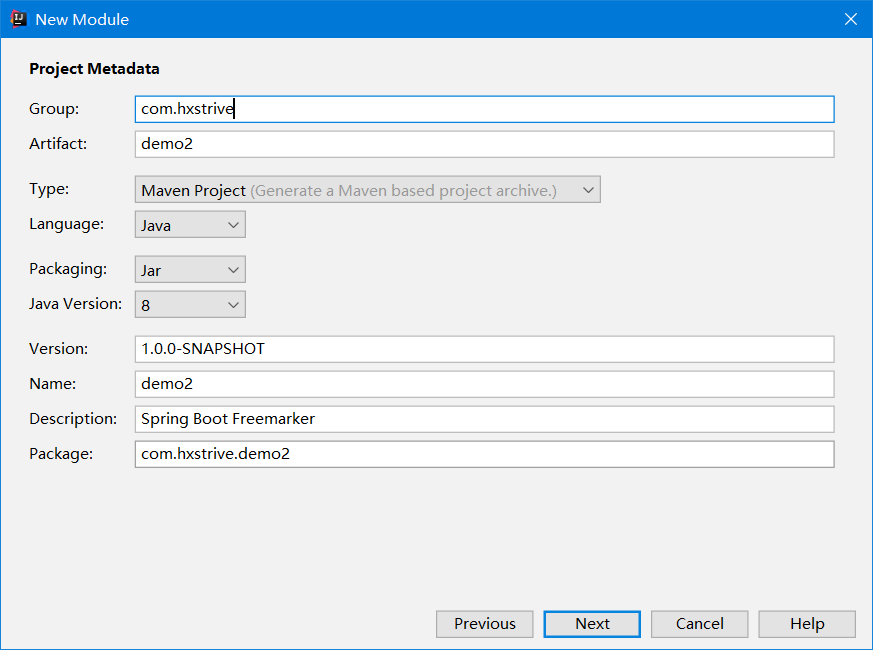
(3)填写 Maven 项目的 group、artifact 和 jdk 版本等信息。如下图:
freemarker广告位
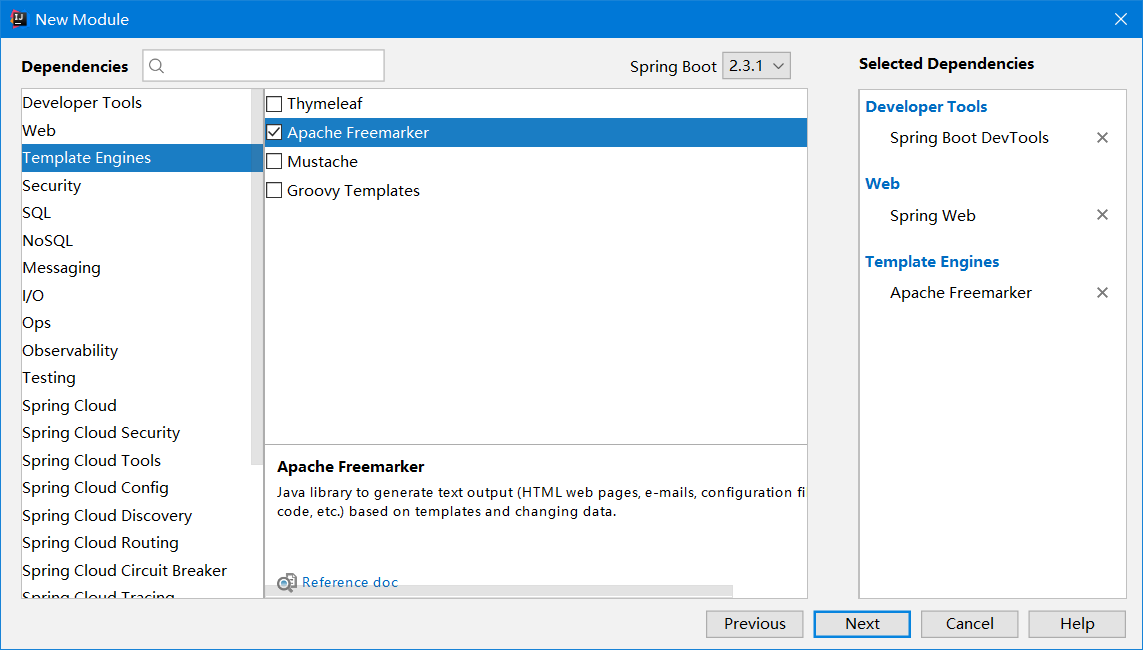
(4)添加 Spring Boot 依赖(此时,就是使用第2步选择的 https://start.spring.io 地址去加载依赖,供我们选择 ),此时我们选择 Spring Web 和 Apache Freemarkerr 依赖。如下图:
(5)项目 pom 的依赖如下:
<dependencies>
    <dependency>
        <groupId>org.springframework.boot</groupId>
        <artifactId>spring-boot-starter-freemarker</artifactId>
    </dependency>
    <dependency>
        <groupId>org.springframework.boot</groupId>
        <artifactId>spring-boot-starter-web</artifactId>
    </dependency>
    <dependency>
        <groupId>org.springframework.boot</groupId>
        <artifactId>spring-boot-devtools</artifactId>
        <scope>runtime</scope>
        <optional>true</optional>
    </dependency>
    <dependency>
        <groupId>org.springframework.boot</groupId>
        <artifactId>spring-boot-starter-test</artifactId>
        <scope>test</scope>
        <exclusions>
            <exclusion>
                <groupId>org.junit.vintage</groupId>
                <artifactId>junit-vintage-engine</artifactId>
            </exclusion>
        </exclusions>
    </dependency>
</dependencies>
(6)修改 application.properties 文件,添加 freemarker 配置信息。如下:
## Freemarker
# 指定 HttpServletRequest 的属性是否可以覆盖 controller 中与 model 同名项
spring.freemarker.allow-request-override=false
# 是否开启模版缓存
spring.freemarker.cache=true
# 是否检查模版路径是否存在
spring.freemarker.check-template-location=true
# 设定模版编码
spring.freemarker.charset=utf-8
# 设定Content-Type
spring.freemarker.content-type=text/html
# 设定所有request的属性在merge到模板的时候,是否要都添加到model中
spring.freemarker.expose-request-attributes=false
# 设定所有HttpSession的属性在merge到模板的时候,是否要都添加到model中
spring.freemarker.expose-session-attributes=false
# 设定是否以springMacroRequestContext的形式暴露RequestContext给Spring’s macrolibrary使用
spring.freemarker.expose-spring-macro-helpers=false
# 设定freemarker模板的前缀
spring.freemarker.prefix=
# 指定RequestContext属性的名
spring.freemarker.request-context-attribute=freemarker
# 设定模板的后缀
spring.freemarker.suffix=.ftl
# 设定模板的加载路径,多个以逗号分隔,默认: ["classpath:/templates/"]
spring.freemarker.template-loader-path=classpath:/templates/
# 指定使用模板的视图列表
#spring.freemarker.view-names=
# Logging
logging.level.root=DEBUG
(7)添加控制器,该控制器返回 freemarker 模版文件。如下:
package com.hxstrive.demo2;

import org.springframework.boot.SpringApplication;
import org.springframework.boot.autoconfigure.SpringBootApplication;
import org.springframework.stereotype.Controller;
import org.springframework.web.bind.annotation.RequestMapping;

import java.text.SimpleDateFormat;
import java.util.Date;
import java.util.Map;

@SpringBootApplication
@Controller
public class Demo2Application {

    public static void main(String[] args) {
        SpringApplication.run(Demo2Application.class, args);
    }

    @RequestMapping("/")
    public String index(Map<String,Object> map) {
        map.put("title", "Spring Boot 集成 FreeMarker");
        map.put("date", new SimpleDateFormat(
                "yyyy-MM-dd HH:mm:ss").format(new Date()));
        return "index";
    }

}
(8)编写 freemarker 模版文件,该文件放到 templates 目录下面。内容如下:
<!DOCTYPE html>
<html lang="en">
<head>
    <meta charset="UTF-8">
    <title>SpringBoot集成FreeMarker</title>
</head>
<body>
    <h1>${title?default('title')}</h1>
    <p>${date?default('')}</p>
</body>
</html>
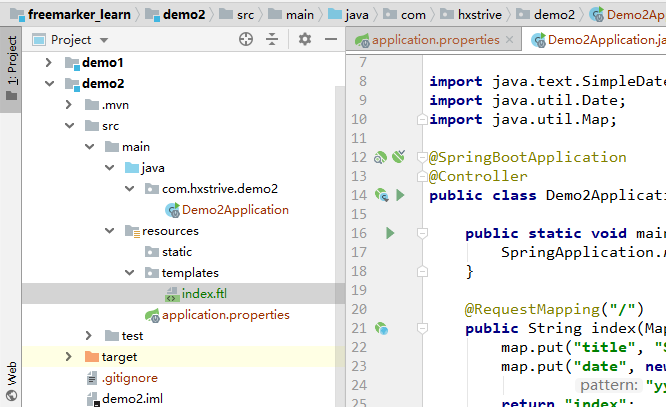
(9)项目结构图如下:
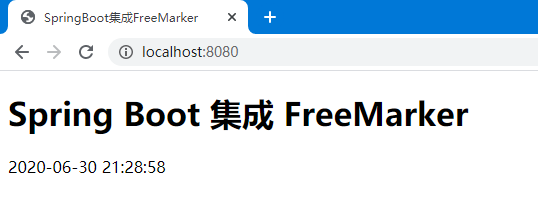
(10)项目运行效果图如下:
项目源码见 demo2 子模块。

 川公网安备51010802032098