前面章节介绍了在 Ubuntu 和 Windows 下面安装 nginx,均采用二进制的方式进行安装。本章节将介绍采用编译源码来安装 nginx,采用源码安装可以根据自己的需要编译部分模块到 nginx 中。
下载源码包
进入 nginx 官网,下载 .tar.gz 源码包,下载地址:http://nginx.org/download/nginx-1.20.1.tar.gz
在 Ubuntu 中,我们可以使用 wget 命令进行下载,如下:
hxstrive@ubuntu:~/Desktop$ wget http://nginx.org/download/nginx-1.20.1.tar.gz
--2021-09-27 12:38:47--  http://nginx.org/download/nginx-1.20.1.tar.gz
正在解析主机 nginx.org (nginx.org)... 3.125.197.172, 52.58.199.22, 2a05:d014:edb:5702::6, ...
正在连接 nginx.org (nginx.org)|3.125.197.172|:80... 已连接。
已发出 HTTP 请求,正在等待回应... 200 OK
长度: 1061461 (1.0M) [application/octet-stream]
正在保存至: “nginx-1.20.1.tar.gz”

nginx-1.20.1.tar.gz           100%[===============================================>]   1.01M   459KB/s    用时 2.3s

2021-09-27 12:38:52 (459 KB/s) - 已保存 “nginx-1.20.1.tar.gz” [1061461/1061461])
解压源码包
下载完源码包后,使用 tar 命令进行解压。如下:
hxstrive@ubuntu:~/Desktop$ ls
nginx-1.20.1.tar.gz  tmp.html  tmp.txt
hxstrive@ubuntu:~/Desktop$ tar -xvzf nginx-1.20.1.tar.gz
nginx-1.20.1/
nginx-1.20.1/auto/
...
nginx-1.20.1/auto/cc/name
nginx-1.20.1/auto/cc/owc
nginx-1.20.1/auto/cc/sunc
hxstrive@ubuntu:~/Desktop$ ls
nginx-1.20.1  nginx-1.20.1.tar.gz  tmp.html  tmp.txt
预编译 nginx 源码
使用 cd 命令切换到解压后的 nginx 主目录中,执行 ./configure 命令。如下:
hxstrive@ubuntu:~/Desktop/nginx-1.20.1$ ./configure --prefix=/opt/demo/nginx --with-http_stub_status_module --with-http_ssl_module --without-http_rewrite_module --without-http_gzip_module
checking for OS
 + Linux 5.11.0-34-generic x86_64
checking for C compiler ... found
 + using GNU C compiler
 + gcc version: 9.3.0 (Ubuntu 9.3.0-17ubuntu1~20.04)
checking for gcc -pipe switch ... found
...
creating objs/Makefile

Configuration summary
  + PCRE library is not used
  + using system OpenSSL library
  + zlib library is not used

  nginx path prefix: "/opt/demo/nginx"
  nginx binary file: "/opt/demo/nginx/sbin/nginx"
  nginx modules path: "/opt/demo/nginx/modules"
  nginx configuration prefix: "/opt/demo/nginx/conf"
  nginx configuration file: "/opt/demo/nginx/conf/nginx.conf"
  nginx pid file: "/opt/demo/nginx/logs/nginx.pid"
  nginx error log file: "/opt/demo/nginx/logs/error.log"
  nginx http access log file: "/opt/demo/nginx/logs/access.log"
  nginx http client request body temporary files: "client_body_temp"
  nginx http proxy temporary files: "proxy_temp"
  nginx http fastcgi temporary files: "fastcgi_temp"
  nginx http uwsgi temporary files: "uwsgi_temp"
  nginx http scgi temporary files: "scgi_temp"
hxstrive@ubuntu:~/Desktop/nginx-1.20.1$ ls
auto  CHANGES  CHANGES.ru  conf  configure  contrib  html  LICENSE  Makefile  man  objs  README  src
在对 nginx 进行构建时,我们可以使用 configure 命令进行配置,它可以定义 nginx 的各个方面,包括允许 nginx 用于连接处理的方法。最后,configure 会创建一个 Makefile。
关于更多 configure 命令参数请参考“Configure 命令参数”。
nginx广告位
make 编译 nginx 源码
make 编译是基于 configure 命令生成的 makefile 文件,进行源码编译。如下:
hxstrive@ubuntu:~/Desktop/nginx-1.20.1$ make
make -f objs/Makefile
make[1]: 进入目录“/home/hxstrive/Desktop/nginx-1.20.1”
cc -c -pipe  -O -W -Wall -Wpointer-arith -Wno-unused-parameter -Werror -g  -I src/core -I src/event -I src/event/modules -I src/os/unix -I objs
...
cc -o objs/nginx
objs/src/core/nginx.o
objs/src/core/ngx_log.o
...
objs/ngx_modules.o
-ldl -lpthread -lcrypt -lssl -lcrypto -ldl -lpthread
-Wl,-E
sed -e "s|%%PREFIX%%|/opt/demo/nginx|"
	-e "s|%%PID_PATH%%|/opt/demo/nginx/logs/nginx.pid|"
	-e "s|%%CONF_PATH%%|/opt/demo/nginx/conf/nginx.conf|"
	-e "s|%%ERROR_LOG_PATH%%|/opt/demo/nginx/logs/error.log|"
	< man/nginx.8 > objs/nginx.8
make[1]: 离开目录“/home/hxstrive/Desktop/nginx-1.20.1”
make install 安装 nginx
make 编译完毕之后,将相关的可运行文件安装至系统中。如下:
hxstrive@ubuntu:~/Desktop/nginx-1.20.1$ sudo make install
[sudo] hxstrive 的密码:
make -f objs/Makefile install
make[1]: 进入目录“/home/hxstrive/Desktop/nginx-1.20.1”
test -d '/opt/demo/nginx' || mkdir -p '/opt/demo/nginx'
test -d '/opt/demo/nginx/sbin'
	|| mkdir -p '/opt/demo/nginx/sbin'
test ! -f '/opt/demo/nginx/sbin/nginx'
	|| mv '/opt/demo/nginx/sbin/nginx'
		'/opt/demo/nginx/sbin/nginx.old'
cp objs/nginx '/opt/demo/nginx/sbin/nginx'
test -d '/opt/demo/nginx/conf'
	|| mkdir -p '/opt/demo/nginx/conf'
cp conf/koi-win '/opt/demo/nginx/conf'
cp conf/koi-utf '/opt/demo/nginx/conf'
cp conf/win-utf '/opt/demo/nginx/conf'
test -f '/opt/demo/nginx/conf/mime.types'
	|| cp conf/mime.types '/opt/demo/nginx/conf'
cp conf/mime.types '/opt/demo/nginx/conf/mime.types.default'
test -f '/opt/demo/nginx/conf/fastcgi_params'
	|| cp conf/fastcgi_params '/opt/demo/nginx/conf'
cp conf/fastcgi_params
	'/opt/demo/nginx/conf/fastcgi_params.default'
test -f '/opt/demo/nginx/conf/fastcgi.conf'
	|| cp conf/fastcgi.conf '/opt/demo/nginx/conf'
cp conf/fastcgi.conf '/opt/demo/nginx/conf/fastcgi.conf.default'
test -f '/opt/demo/nginx/conf/uwsgi_params'
	|| cp conf/uwsgi_params '/opt/demo/nginx/conf'
cp conf/uwsgi_params
	'/opt/demo/nginx/conf/uwsgi_params.default'
test -f '/opt/demo/nginx/conf/scgi_params'
	|| cp conf/scgi_params '/opt/demo/nginx/conf'
cp conf/scgi_params
	'/opt/demo/nginx/conf/scgi_params.default'
test -f '/opt/demo/nginx/conf/nginx.conf'
	|| cp conf/nginx.conf '/opt/demo/nginx/conf/nginx.conf'
cp conf/nginx.conf '/opt/demo/nginx/conf/nginx.conf.default'
test -d '/opt/demo/nginx/logs'
	|| mkdir -p '/opt/demo/nginx/logs'
test -d '/opt/demo/nginx/logs'
	|| mkdir -p '/opt/demo/nginx/logs'
test -d '/opt/demo/nginx/html'
	|| cp -R html '/opt/demo/nginx'
test -d '/opt/demo/nginx/logs'
	|| mkdir -p '/opt/demo/nginx/logs'
make[1]: 离开目录“/home/hxstrive/Desktop/nginx-1.20.1”
验证 nginx
hxstrive@ubuntu:~/Desktop/nginx-1.20.1/objs$ ./nginx -v
nginx version: nginx/1.20.1
xstrive@ubuntu:~/Desktop/nginx-1.20.1/objs$ sudo ./nginx
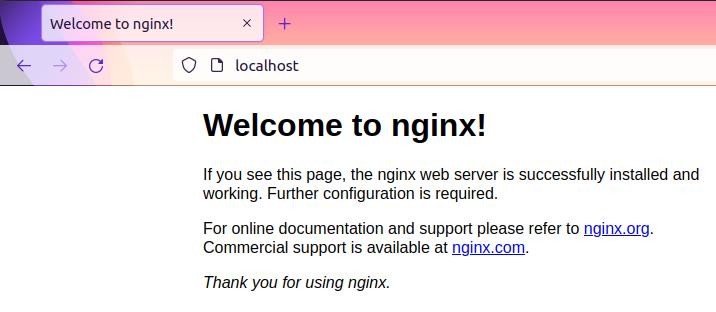
使用浏览器访问 http://localhost 地址,如果出现下图内容,则说明安装成功:

 川公网安备51010802032098