本章将通过在 Spring Cloud 中集成 Nacos,并且开启配置管理功能,快速了解如何将在项目中使用 Nacos 实现配置管理。
Nacos 配置
打开 Nacos 页面,在 dev 命名空间下添加一个名为 “nacos_spring_cloud” 的配置集,如下图:
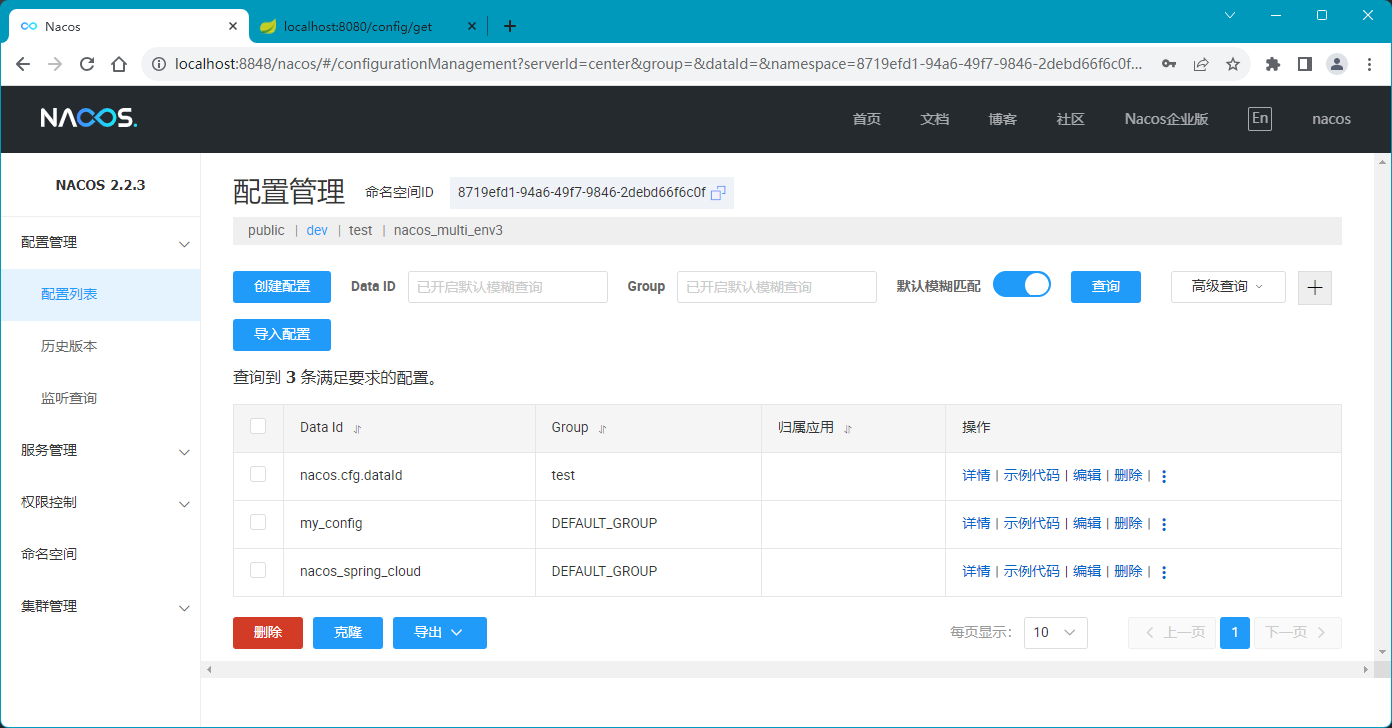
nacos_spring_cloud 配置集的内容如下:

创建项目
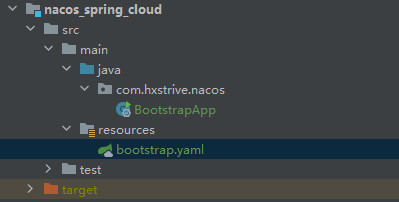
使用 IDEA 创建 Spring Boot 项目,项目结构如下:
nacos 广告位
项目依赖
添加 Spring Cloud 和 Spring Cloud Alibaba 依赖到项目 pom.xml 中,如下:
<?xml version="1.0" encoding="UTF-8"?>
<project xmlns="http://maven.apache.org/POM/4.0.0"
        xmlns:xsi="http://www.w3.org/2001/XMLSchema-instance"
        xsi:schemaLocation="http://maven.apache.org/POM/4.0.0 http://maven.apache.org/xsd/maven-4.0.0.xsd">
   <modelVersion>4.0.0</modelVersion>
   <parent>
       <groupId>com.hxstrive.nacos</groupId>
       <artifactId>springcloud_alibaba_nacos</artifactId>
       <version>1.0-SNAPSHOT</version>
   </parent>
   <artifactId>nacos_spring_cloud</artifactId>
   <name>nacos_spring_cloud</name>

   <properties>
       <project.build.sourceEncoding>UTF-8</project.build.sourceEncoding>
       <maven.compiler.source>1.8</maven.compiler.source>
       <maven.compiler.target>1.8</maven.compiler.target>
   </properties>

   <!-- 导入所有依赖 -->
   <dependencyManagement>
       <dependencies>
           <dependency>
               <groupId>com.alibaba.cloud</groupId>
               <artifactId>spring-cloud-alibaba-dependencies</artifactId>
               <version>2.1.2.RELEASE</version>
               <type>pom</type>
               <scope>import</scope>
           </dependency>
           <!-- https://mvnrepository.com/artifact/org.springframework.cloud/spring-cloud-dependencies -->
           <dependency>
               <groupId>org.springframework.cloud</groupId>
               <artifactId>spring-cloud-dependencies</artifactId>
               <version>Greenwich.RELEASE</version>
               <type>pom</type>
               <scope>import</scope>
           </dependency>
           <!-- https://mvnrepository.com/artifact/org.springframework.boot/spring-boot-dependencies -->
           <dependency>
               <groupId>org.springframework.boot</groupId>
               <artifactId>spring-boot-dependencies</artifactId>
               <version>2.1.3.RELEASE</version>
               <type>pom</type>
               <scope>import</scope>
           </dependency>
       </dependencies>
   </dependencyManagement>

   <dependencies>
       <!-- Spring Boot Begin -->
       <dependency>
           <groupId>org.springframework.boot</groupId>
           <artifactId>spring-boot-starter-web</artifactId>
       </dependency>
       <dependency>
           <groupId>org.springframework.boot</groupId>
           <artifactId>spring-boot-starter-actuator</artifactId>
       </dependency>
       <dependency>
           <groupId>org.springframework.boot</groupId>
           <artifactId>spring-boot-starter-test</artifactId>
           <scope>test</scope>
       </dependency>
       <!-- Spring Boot End -->

       <!-- Spring Cloud Begin -->
       <dependency>
           <groupId>com.alibaba.cloud</groupId>
           <artifactId>spring-cloud-starter-alibaba-nacos-config</artifactId>
       </dependency>
       <!-- Spring Cloud End -->
   </dependencies>

   <build>
       <plugins>
           <plugin>
               <groupId>org.springframework.boot</groupId>
               <artifactId>spring-boot-maven-plugin</artifactId>
           </plugin>
       </plugins>
   </build>
</project>
配置项目
在项目的 resources 目录下面创建一个 bootstrap.yaml 配置文件,内容如下:
server:
 port: 8080

spring:
 application:
   # 应用名称,用来匹配 Nacos 中的配置集
   # 默认将根据下面指定的 spring.cloud.config.namespace + spring.cloud.config.group + spring.application.name + file-extension
   # 进行匹配,例如:当前应用将匹配
   # 8719efd1-94a6-49f7-9846-2debd66f6c0f 命名空间中 DEFAULT_GROUP 分组下
   # 名为 nacos_spring_cloud 且格式为 yaml 的配置集
   name: nacos_spring_cloud
 cloud:
   nacos:
     config:
       # Nacos 服务地址
       server-addr: 127.0.0.1:8848
       # Nacos 配置文件扩展名
       file-extension: yaml
       # Nacos 命名空间ID
       namespace: 8719efd1-94a6-49f7-9846-2debd66f6c0f
       # Nacos 分组
       group: DEFAULT_GROUP
       # Nacos 登录账号
       username: nacos
       # Nacos 登录密码
       password: nacos
项目启动类
创建 BootstrapApp 类,该类其实就是一个简单的 Spring Boot 启动类,并且将该类声明为一个简单的控制器,提供一个 get 方法,用来获取 name 配置信息。代码如下:
package com.hxstrive.nacos;

import org.springframework.beans.factory.annotation.Value;
import org.springframework.boot.SpringApplication;
import org.springframework.boot.autoconfigure.SpringBootApplication;
import org.springframework.web.bind.annotation.GetMapping;
import org.springframework.web.bind.annotation.RequestMapping;
import org.springframework.web.bind.annotation.RestController;

/**
* 入口类
* @author hxstrive.com
*/
@SpringBootApplication
@RestController
@RequestMapping("/config")
public class BootstrapApp {
   public static void main(String[] args) {
       SpringApplication.run(BootstrapApp.class, args);
   }

   @Value("${name}")
   private String name;

   @GetMapping("/get")
   public String get() {
       return name;
   }
}
启动&验证
和运行 Spring Boot 项目一样,项目启动成功后,使用浏览器访问 http://localhost:8080/config/get 地址访问配置信息,如下图:

如果此时,我们在 Nacos 中修改配置且重新发布,刷新上面地址,你会发现并不会加载最新的配置。此时,我们可以通过 ConfigurableApplicationContext 上下文对象实现加载最新的配置,代码如下:
package com.hxstrive.nacos;

import com.alibaba.nacos.api.config.annotation.NacosValue;
import org.springframework.beans.factory.annotation.Autowired;
import org.springframework.beans.factory.annotation.Value;
import org.springframework.boot.SpringApplication;
import org.springframework.boot.autoconfigure.SpringBootApplication;
import org.springframework.context.ConfigurableApplicationContext;
import org.springframework.web.bind.annotation.GetMapping;
import org.springframework.web.bind.annotation.RequestMapping;
import org.springframework.web.bind.annotation.RestController;

/**
* 入口类
* @author hxstrive.com
*/
@SpringBootApplication
@RestController
@RequestMapping("/config")
public class BootstrapApp {
   public static void main(String[] args) {
       SpringApplication.run(BootstrapApp.class, args);
   }

   @Value("${name}")
   private String name;

   // 获取不到值
   @NacosValue(value = "${name}", autoRefreshed = true)
   private String name2;

   // 用来动态获取配置
   @Autowired
   private ConfigurableApplicationContext applicationContext;

   @GetMapping("/get")
   public String get() {
       // 关键代码 applicationContext.getEnvironment().getProperty("name")
       return name + ", " + name2 + ", " + applicationContext.getEnvironment().getProperty("name");
   }
}
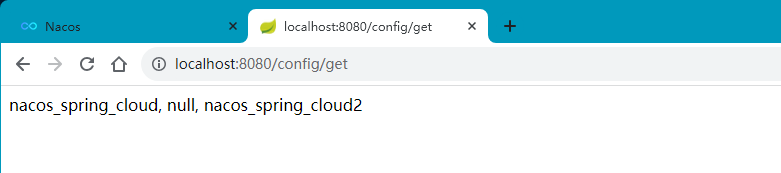
运行应用,访问地址,输出如下图:
还有更简单的解决办法,即通过 @RefreshScope 注解实现,如下:
package com.hxstrive.nacos;

import com.alibaba.nacos.api.config.annotation.NacosValue;
import org.springframework.beans.factory.annotation.Autowired;
import org.springframework.beans.factory.annotation.Value;
import org.springframework.boot.SpringApplication;
import org.springframework.boot.autoconfigure.SpringBootApplication;
import org.springframework.cloud.context.config.annotation.RefreshScope;
import org.springframework.context.ConfigurableApplicationContext;
import org.springframework.web.bind.annotation.GetMapping;
import org.springframework.web.bind.annotation.RequestMapping;
import org.springframework.web.bind.annotation.RestController;

/**
* 入口类
* @author hxstrive.com
*/
@SpringBootApplication
@RestController
@RequestMapping("/config")
// 添加该注解
@RefreshScope
public class BootstrapApp {
   //...
}
@RefreshScope 是 Spring Framework 中的一个注解,主要用于 Spring Cloud Config 模块,用于支持微服务和云原生应用的动态配置属性刷新,而无需完全重新启动应用。
其工作原理如下:
(1)配置属性:Spring 应用程序通常将配置属性外部化以在应用代码之外进行管理。这些属性可以存储在配置服务器中,如 Spring Cloud Config 服务器,允许您在不重新部署应用的情况下更改配置。
(2)动态刷新:当您使用 @RefreshScope 注解标记类或特定的 Bean 时,它告诉 Spring,该类或 Bean 的配置属性可以动态刷新。当外部配置服务器中的配置属性更新时,您可以触发应用程序中这些属性的刷新,而无需重新启动它。
(3)触发刷新:要触发刷新,您可以发送一个 HTTP POST 请求到您的 Spring Boot 应用程序的 /actuator/refresh 端点。这将导致 Spring 重新获取和更新使用 @RefreshScope 标记的外部化配置属性。

 川公网安备51010802032098