本文将通过一个示例介绍怎样去使用 Thymeleaf 模板引擎。下面示例将使用 Spring Boot 快速搭建示例项目,搭建示例的详细步骤如下。
环境介绍
操作系统:Windows11
JDK版本:JDK 1.8
框架:Spring Boot 2.7.5
项目依赖
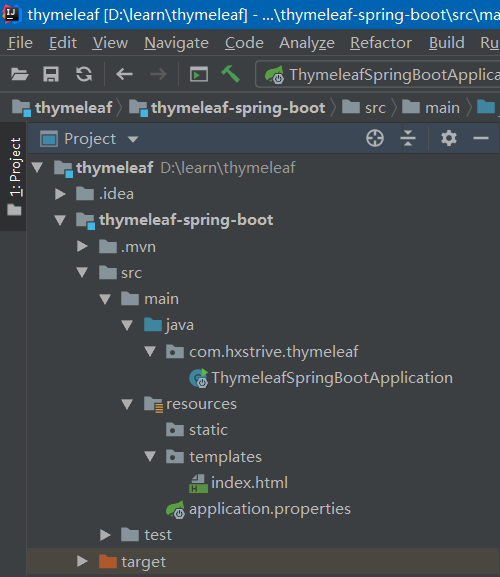
使用 IDEA 或者 start.spring.io 在线工具创建一个简单的 Spring Boot 项目,项目 pom 依赖如下:
<?xml version="1.0" encoding="UTF-8"?>
<project xmlns="http://maven.apache.org/POM/4.0.0"
        xmlns:xsi="http://www.w3.org/2001/XMLSchema-instance"
        xsi:schemaLocation="http://maven.apache.org/POM/4.0.0 https://maven.apache.org/xsd/maven-4.0.0.xsd">
    <modelVersion>4.0.0</modelVersion>
    <parent>
        <groupId>org.springframework.boot</groupId>
        <artifactId>spring-boot-starter-parent</artifactId>
        <version>2.7.5</version>
        <relativePath/> <!-- lookup parent from repository -->
    </parent>
    <groupId>com.hxstrive</groupId>
    <artifactId>thymeleaf-spring-boot</artifactId>
    <version>0.0.1-SNAPSHOT</version>
    <name>thymeleaf-spring-boot</name>
    <description>Demo project for Spring Boot</description>

    <properties>
        <java.version>1.8</java.version>
    </properties>

    <dependencies>
        <dependency>
            <groupId>org.springframework.boot</groupId>
            <artifactId>spring-boot-starter-thymeleaf</artifactId>
        </dependency>

        <dependency>
            <groupId>org.springframework.boot</groupId>
            <artifactId>spring-boot-starter-web</artifactId>
        </dependency>

        <dependency>
            <groupId>org.springframework.boot</groupId>
            <artifactId>spring-boot-devtools</artifactId>
            <scope>runtime</scope>
            <optional>true</optional>
        </dependency>

        <dependency>
            <groupId>org.projectlombok</groupId>
            <artifactId>lombok</artifactId>
            <optional>true</optional>
        </dependency>

        <dependency>
            <groupId>org.springframework.boot</groupId>
            <artifactId>spring-boot-starter-test</artifactId>
            <scope>test</scope>
        </dependency>

        <dependency>
            <groupId>com.alibaba</groupId>
            <artifactId>fastjson</artifactId>
            <version>1.2.79</version>
        </dependency>
    </dependencies>

    <build>
        <plugins>
            <plugin>
                <groupId>org.springframework.boot</groupId>
                <artifactId>spring-boot-maven-plugin</artifactId>
                <configuration>
                    <excludes>
                        <exclude>
                            <groupId>org.projectlombok</groupId>
                            <artifactId>lombok</artifactId>
                        </exclude>
                    </excludes>
                </configuration>
            </plugin>
        </plugins>
    </build>

</project>
thymeleaf广告位
服务端
在创建好的 Spring Boot 项目中,打开启动类,在启动类中映射根(“/”)页面请求,代码如下:
package com.hxstrive.thymeleaf;

import org.springframework.boot.SpringApplication;
import org.springframework.boot.autoconfigure.SpringBootApplication;
import org.springframework.stereotype.Controller;
import org.springframework.web.bind.annotation.RequestMapping;
import java.util.Map;

/**
 * 启动类
 * @author Administrator
 */
@Controller
@SpringBootApplication
public class ThymeleafSpringBootApplication {

    public static void main(String[] args) {
        SpringApplication.run(ThymeleafSpringBootApplication.class, args);
    }

    // 创建一个页面请求
    @RequestMapping("/")
    public String index(Map<String,Object> root) {
        // 设置一个属性值,名为 title,用来在前段页面获取
        root.put("title", "Welcome to learn thymeleaf3.");
        return "index.html";
    }

}
客户端
在 Spring Boot 项目的 resources/templates 目录下面创建 index.html 模板页面。内容如下:
<!DOCTYPE html>
<html xmlns:th="http://www.thymeleaf.org/">
<head>
    <meta charset="UTF-8">
    <title>Thymeleaf模板引擎</title>
</head>
<body>
    <!-- 获取后端传递的名为 title 的属性值 -->
    <h1 th:text="${title}"></h1>
</body>
</html>
注意:上面模板中,在 <html> 标签中通过 xmlns:th 声明了一个命名空间 th,后续所有关于 Thymeleaf 的使用均要通过 th 命名空间来使用。
启动&验证
启动 Spring Boot 项目,在浏览器地址栏输入 http://localhost:8080,效果如下图:
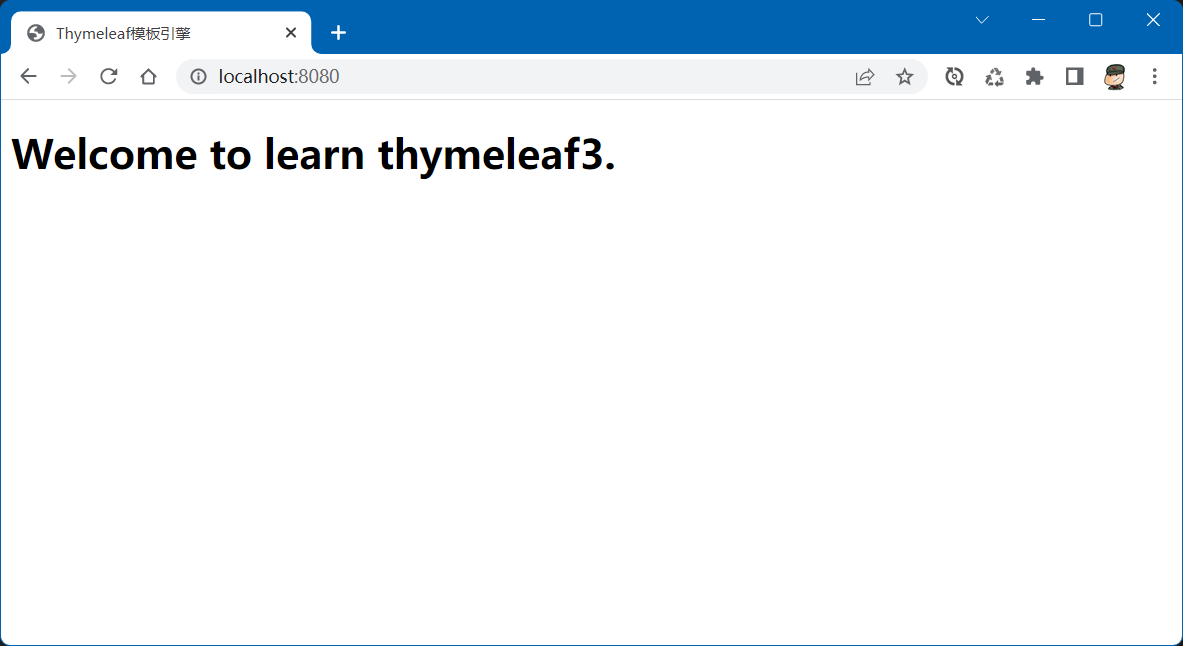
到这里,一个简单的 Thymeleaf 项目就创建完成。

 川公网安备51010802032098