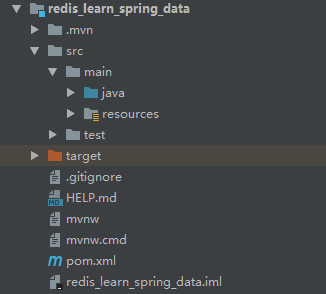
本章节将介绍怎样在 Spring Boot 应用中引入 Spring Data Redis,且使用它操作 Redis NoSQL 数据库。项目结构图如下:
依赖
在 pom.xml 中添加如下依赖:
<?xml version="1.0" encoding="UTF-8"?>
<project xmlns="http://maven.apache.org/POM/4.0.0"
        xmlns:xsi="http://www.w3.org/2001/XMLSchema-instance"
         xsi:schemaLocation="http://maven.apache.org/POM/4.0.0
         https://maven.apache.org/xsd/maven-4.0.0.xsd">
    <modelVersion>4.0.0</modelVersion>
    <parent>
        <groupId>org.springframework.boot</groupId>
        <artifactId>spring-boot-starter-parent</artifactId>
        <version>2.1.7.RELEASE</version>
        <relativePath/> <!-- lookup parent from repository -->
    </parent>
    <groupId>com.huangx.redis</groupId>
    <artifactId>redis_learn_spring_data</artifactId>
    <version>1.0-SNAPSHOT</version>
    <name>redis_learn_spring_data</name>
    <description>Spring Boot for redis</description>

    <properties>
        <java.version>1.8</java.version>
    </properties>

    <dependencies>
        <!-- Spring Data Redis 依赖 -->
        <dependency>
            <groupId>org.springframework.boot</groupId>
            <artifactId>spring-boot-starter-data-redis</artifactId>
        </dependency>

        <dependency>
            <groupId>org.springframework.boot</groupId>
            <artifactId>spring-boot-devtools</artifactId>
            <scope>runtime</scope>
            <optional>true</optional>
        </dependency>

        <dependency>
            <groupId>org.springframework.boot</groupId>
            <artifactId>spring-boot-starter-test</artifactId>
            <scope>test</scope>
        </dependency>
    </dependencies>

    <build>
        <plugins>
            <plugin>
                <groupId>org.springframework.boot</groupId>
                <artifactId>spring-boot-maven-plugin</artifactId>
            </plugin>
        </plugins>
    </build>

</project>
配置
创建一个 Configuration 配置类,代码如下:
package com.hxstrive.redis.config;

import org.springframework.context.annotation.Bean;
import org.springframework.context.annotation.Configuration;
import org.springframework.data.redis.connection.RedisConnectionFactory;
import org.springframework.data.redis.core.RedisTemplate;
import org.springframework.data.redis.serializer.StringRedisSerializer;

/**
 * Redis配置
 * @author hxstrive.com 2022/2/26
 */
@Configuration
public class RedisConfig {

    @Bean
    public RedisTemplate<String,String> redisTemplate(RedisConnectionFactory factory) {
        RedisTemplate<String,String> redisTemplate = new RedisTemplate<>();
        // 为 Tempalte 设置连接工厂
        redisTemplate.setConnectionFactory(factory);

        // 设置 Key 的序列化方式
        redisTemplate.setKeySerializer(new StringRedisSerializer());
        // 设置 Value 的序列化方式
        redisTemplate.setValueSerializer(new StringRedisSerializer());
        // 设置默认序列化方式
        redisTemplate.setDefaultSerializer(new StringRedisSerializer());
        redisTemplate.afterPropertiesSet();

        return redisTemplate;
    }

}
springdata广告位
示例代码
创建一个简单的单元测试类,使用 @RunWith 和 @SpringBootTest 注解启动 Spring Boot 的单元测试,代码如下:
package com.hxstrive.redis;

import org.junit.Test;
import org.junit.runner.RunWith;
import org.springframework.beans.factory.annotation.Autowired;
import org.springframework.boot.test.context.SpringBootTest;
import org.springframework.data.redis.core.RedisTemplate;
import org.springframework.data.redis.core.ValueOperations;
import org.springframework.test.context.junit4.SpringRunner;

/**
 * Spring Data Redis 入门示例
 * @author hxstrive.com 2022/2/26
 */
@RunWith(SpringRunner.class)
@SpringBootTest
public class HelloWorld {

    @Autowired
    private RedisTemplate<String,String> redisTemplate;

    @Test
    public void contextLoads() {
        System.out.println("redisTemplate = " + redisTemplate);

        ValueOperations<String,String> ops = redisTemplate.opsForValue();
        System.out.println("ops = " + ops);

        // 写入数据到 Redis
        ops.set("spring-data-redis", "Hi! Spring Data Redis");
        // 从 Redis 获取数据
        System.out.println(ops.get("spring-data-redis"));
    }

}
运行代码输出如下:
redisTemplate = org.springframework.data.redis.core.RedisTemplate@4a50d04a
ops = org.springframework.data.redis.core.DefaultValueOperations@4d7a64ca
Hi! Spring Data Redis

 川公网安备51010802032098