Spring Boot CLI 提供了一种有趣的、不同寻常的 Spring 应用程序开发方式。后续章节将详细解释 Spring Boot CLI 提供的功能。我们先来看看如何安装Spring Boot CLI!
手工安装Spring Boot CLI
安装Spring Boot CLI最直接的方法大约是下载、 解压, 随后将它的bin目录添加到系统路径里。你可以从以下两个地址下载分发包:
https://repo.spring.io/release/org/springframework/boot/spring-boot-cli/2.3.1.RELEASE/spring-boot-cli-2.3.1.RELEASE-bin.zip
https://repo.spring.io/release/org/springframework/boot/spring-boot-cli/2.3.1.RELEASE/spring-boot-cli-2.3.1.RELEASE-bin.tar.gz
下载完成之后,把它解压到文件系统的任意目录里。Spring Boot CLI 目录结构如下图:
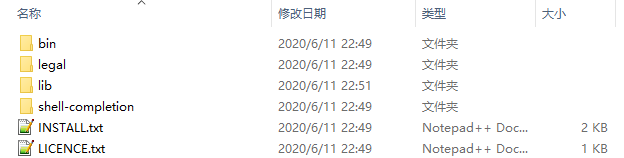
进入 bin 目录,其中包含了一个 spring.bat 脚本(用于Windows环境)和一个spring脚本(用于 Unix/Linux 环境)。如下图:

把这个bin目录添加到系统路径里,然后就能使用 Spring Boot CLI了。如下:
C:\Users\Administrator> spring --version
Spring CLI v2.3.1.RELEASE
springboot广告位
Spring Boot CLI 创建项目
在使用 Spring Boot CLI 之前,我们可以使用 “spring --help” 命令查看 帮助信息。如下:
C:\Users\Administrator\Desktop>spring --help
usage: spring [--help] [--version]
       <command> [<args>]
Available commands are:
  run [options] <files> [--] [args]
    Run a spring groovy script
  grab
    Download a spring groovy script's dependencies to ./repository
  jar [options] <jar-name> <files>
    Create a self-contained executable jar file from a Spring Groovy script
  war [options] <war-name> <files>
    Create a self-contained executable war file from a Spring Groovy script
  install [options] <coordinates>
    Install dependencies to the lib/ext directory
  uninstall [options] <coordinates>
    Uninstall dependencies from the lib/ext directory
  init [options] [location]
    Initialize a new project using Spring Initializr (start.spring.io)
  encodepassword [options] <password to encode>
    Encode a password for use with Spring Security
  shell
    Start a nested shell
Common options:
  --debug Verbose mode
    Print additional status information for the command you are running
See 'spring help <command>' for more information on a specific command.
根据上面帮助信息,我们可以使用 init(Initialize a new project using Spring Initializr (start.spring.io)) 命令创建项目。
使用 “spring help init” 查看 init 命令的帮助信息。如下:
C:\Users\Administrator\Desktop>spring help init
spring init - Initialize a new project using Spring Initializr (start.spring.io)
usage: spring init [options] [location]
Option                       Description
------                       -----------
-a, --artifactId <String>    Project coordinates; infer archive name (for
                               example 'test')
-b, --boot-version <String>  Spring Boot version (for example '1.2.0.RELEASE')
--build <String>             Build system to use (for example 'maven' or
                               'gradle') (default: maven)
-d, --dependencies <String>  Comma-separated list of dependency identifiers to
                               include in the generated project
--description <String>       Project description
-f, --force                  Force overwrite of existing files
--format <String>            Format of the generated content (for example
                               'build' for a build file, 'project' for a
                               project archive) (default: project)
-g, --groupId <String>       Project coordinates (for example 'org.test')
-j, --java-version <String>  Language level (for example '1.8')
-l, --language <String>      Programming language  (for example 'java')
--list                       List the capabilities of the service. Use it to
                               discover the dependencies and the types that are
                               available
-n, --name <String>          Project name; infer application name
-p, --packaging <String>     Project packaging (for example 'jar')
--package-name <String>      Package name
-t, --type <String>          Project type. Not normally needed if you use --
                               build and/or --format. Check the capabilities of
                               the service (--list) for more details
--target <String>            URL of the service to use (default: https://start.
                               spring.io)
-v, --version <String>       Project version (for example '0.0.1-SNAPSHOT')
-x, --extract                Extract the project archive. Inferred if a
                               location is specified without an extension
examples:
    To list all the capabilities of the service:
        $ spring init --list
    To creates a default project:
        $ spring init
    To create a web my-app.zip:
        $ spring init -d=web my-app.zip
    To create a web/data-jpa gradle project unpacked:
        $ spring init -d=web,jpa --build=gradle my-dir
根据上面的帮助创建一个简单的项目。实例:
spring init --build=maven --java-version=1.8 --dependencies=web
        --packaging=jar --boot-version=1.5.7.RELEASE
        --groupId=com.hxstrive.demo --artifactId=demo

 川公网安备51010802032098