以下是一个基于官方 MySQL 镜像构建自定义 MySQL 镜像的 Containerfile 示例,包含初始化脚本、自定义配置、环境变量设置等功能。该镜像会预先创建数据库、用户,并加载初始 SQL 脚本。
目录结构
由于我们需要自定义配置、指定初始化脚本,因此需要提前准备好一个目录层级机构,然后根据该目录结构编写 Containerfile 文件,将配置文件和初始化脚本复制到镜像的指定目录,目录结构如下:
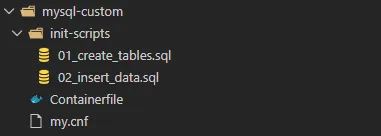
mysql-custom/
├── Containerfile       # 构建镜像的配置文件
├── my.cnf              # 自定义 MySQL 配置
└── init-scripts/       # 初始化脚本目录
    ├── 01_create_tables.sql
    └── 02_insert_data.sql
准备工作目录
为使 Containerfile 能正常工作,需准备以下文件活目录(与 Containerfile 同级目录):
自定义配置文件 my.cnf
改配置文件用于修改 MySQL 配置(如字符集、连接数等),内容如下:
[mysqld]
# 设置默认字符集为 UTF8mb4(支持 emoji)
character-set-server = utf8mb4
collation-server = utf8mb4_unicode_ci

# 最大连接数
max_connections = 200

# 关闭 ONLY_FULL_GROUP_BY 模式(可选,根据应用需求)
sql_mode = "STRICT_TRANS_TABLES,NO_ZERO_IN_DATE,NO_ZERO_DATE,ERROR_FOR_DIVISION_BY_ZERO,NO_ENGINE_SUBSTITUTION"
初始化 SQL 脚本目录 init-scripts/
创建 init-scripts 目录,用来存放数据库初始化脚本(.sql 或 .sh),目录中有如下两个脚本:
USE appdb;

CREATE TABLE IF NOT EXISTS users (
    id INT AUTO_INCREMENT PRIMARY KEY,
    username VARCHAR(50) NOT NULL UNIQUE,
    email VARCHAR(100) NOT NULL UNIQUE,
    created_at TIMESTAMP DEFAULT CURRENT_TIMESTAMP
);
USE appdb;

INSERT INTO users (username, email) VALUES
    ('testuser', 'test@example.com');
Podman广告
Containerfile 内容
下面是 Containerfile 文件内容:
# 基于官方 MySQL 8.0 镜像(可根据需要替换版本,如 5.7)
FROM mysql:8.0

# 维护者信息(可选)
LABEL maintainer="your-name <your-email>"
LABEL description="Custom MySQL image with init scripts and config"

# 设置环境变量(MySQL 官方镜像支持的环境变量)
# 注意:生产环境中密码不应硬编码,建议运行时通过 -e 传递
ENV MYSQL_ROOT_PASSWORD=rootpass123 \
    MYSQL_DATABASE=appdb \
    MYSQL_USER=appuser \
    MYSQL_PASSWORD=apppass456

# 复制自定义 MySQL 配置文件(如需修改配置,如最大连接数、字符集等)
# 配置文件路径:/etc/mysql/conf.d/ 下的 .cnf 文件会被 MySQL 自动加载
COPY ./my.cnf /etc/mysql/conf.d/custom.cnf

# 复制初始化 SQL 脚本(官方镜像会自动执行 /docker-entrypoint-initdb.d/ 下的 .sql、.sql.gz、.sh 文件)
# 脚本执行顺序:按文件名排序,建议前缀加数字(如 01_create_table.sql、02_insert_data.sql)
COPY ./init-scripts/ /docker-entrypoint-initdb.d/

# 赋予初始化脚本执行权限(如果有 .sh 脚本需要执行)
RUN chmod -R 755 /docker-entrypoint-initdb.d/

# 暴露 MySQL 默认端口(可选,仅声明作用)
EXPOSE 3306

# 官方镜像已内置入口点(ENTRYPOINT)和启动命令(CMD),无需重复定义
# 入口点脚本负责初始化数据库、启动 mysqld 等,如需自定义可覆盖 ENTRYPOINT,但不建议
关键点说明:
官方 MySQL 镜像通过环境变量 MYSQL_ROOT_PASSWORD、MYSQL_DATABASE 等自动初始化数据库,无需手动执行 CREATE DATABASE。
/docker-entrypoint-initdb.d/ 目录下的脚本仅在首次启动(数据目录为空)时执行,后续启动会跳过(避免重复初始化)。
/etc/mysql/conf.d/ 目录下的 .cnf 文件会覆盖默认配置,建议通过此方式修改配置而非直接修改 /etc/mysql/my.cnf。
注意,上面示例中硬编码了密码,在生产环境应通过 podman run -e 动态传递密码(如 -e MYSQL_ROOT_PASSWORD=$(cat password.txt))。
构建镜像
在 mysql-custom 目录下执行以下命令构建镜像:
podman build -t custom-mysql:8.0 .
构建详细日志如下:
D:\Podman\mysql-custom> podman build -t custom-mysql:8.0 .
STEP 1/8: FROM mysql:8.0
Resolving "mysql" using unqualified-search registries (/home/user/.config/containers/registries.conf)
Trying to pull docker.io/library/mysql:8.0...
Getting image source signatures
Copying blob sha256:2a2d53254403ab5a46208cbee5ce6e64030ed6af39a1e396850bd01c2b55991f
Copying blob sha256:4f78e34adfadf620578919075ce76accd335e02f4c4a2494476870c948b24a6a
Copying blob sha256:023a182c62a0ce5adf24030e7fee994ceaa333b22cdb5f1a0835501015edf3ed
Copying blob sha256:c9ecfb07ed08c78d9ae05f96918469f3323983f8353c5f6d8bc1fe7cfe8ca307
Copying blob sha256:a2ed1082d9e2d4196202cfb3cdc3141a99ae7418fad3287e39685890857c7e50
Copying blob sha256:4f94eaa123bffda76b09109dee2f66ab97edc6e02c2250630dba894bb54e9136
Copying blob sha256:48ec49971d9445b77beb107874bc797a8a8f4bfc1eb1c9713618a4a765a13908
Copying blob sha256:fdca9f583d44e2a026171ec7f1854acc693bbe74937321b557cc99c975a190c6
Copying blob sha256:abcf302dead6257c4a894029a3d8ac8b8fca1dd6fe75f58c4b17330e149ce137
Copying blob sha256:37bd516ff7651d7283213508a304b0195681370b924c3f913a13126933ce14ed
Copying blob sha256:d68710a4a4e9516175a58b8eed8a0068ae2d9464ab0fb6d28fc05eb827033b17
Copying config sha256:34178dbaefd067c5997133cbdef31f164aa899689394f70b065725afb7aa322a
Writing manifest to image destination
STEP 2/8: LABEL maintainer="hxstrive.com <hxstrive@outlook.com>"
--> 4f6f4bdfede3
STEP 3/8: LABEL description="Custom MySQL image with init scripts and config"
--> 59219eb324f9
STEP 4/8: ENV MYSQL_ROOT_PASSWORD=rootpass123     MYSQL_DATABASE=appdb     MYSQL_USER=appuser     MYSQL_PASSWORD=apppass456
--> b55958850de3
STEP 5/8: COPY ./my.cnf /etc/mysql/conf.d/custom.cnf
--> 249f3e96e2d7
STEP 6/8: COPY ./init-scripts/ /docker-entrypoint-initdb.d/
--> a748830bfebe
STEP 7/8: RUN chmod -R 755 /docker-entrypoint-initdb.d/
--> 02ab08ed77ce
STEP 8/8: EXPOSE 3306
COMMIT custom-mysql:8.0
--> f631a0f2376f
Successfully tagged localhost/custom-mysql:8.0
f631a0f2376f344320b8648299a98286876d089f1bb7d7cc305b0ed5cb46d01e
使用 podman images 查看构建完成的镜像信息:
D:\Podman\mysql-custom> podman images | findstr custom-mysql
localhost/custom-mysql                 8.0            f631a0f2376f  7 minutes ago  801 MB
运行容器
构建成功后,执行下面命令运行容器进行验证:
# 运行容器(映射端口 3306 到主机,持久化数据到本地目录)
# mysql-data:/var/lib/mysql  数据卷持久化数据
podman run -d --name mysql-test -p 3306:3306 -v mysql-data:/var/lib/mysql custom-mysql:8.0
运行日志如下:
D:\Podman\mysql-custom> podman run -d --name mysql-test -p 3306:3306 -v mysql-data:/var/lib/mysql custom-mysql:8.0
578dfd1b91db18fbec2d098f318c00b519ae5a90c887897e9dbd86fb180916dc

D:\Podman\mysql-custom> podman ps
CONTAINER ID  IMAGE                       COMMAND     CREATED        STATUS        PORTS                              NAMES
578dfd1b91db  localhost/custom-mysql:8.0  mysqld      2 minutes ago  Up 2 minutes  0.0.0.0:3306->3306/tcp, 33060/tcp  mysql-test
连接测试:
# 使用 root 用户连接到 mysql
D:\Podman\mysql-custom> podman exec -it mysql-test mysql -uroot -prootpass123
mysql: [Warning] World-writable config file '/etc/mysql/conf.d/custom.cnf' is ignored.
mysql: [Warning] Using a password on the command line interface can be insecure.
Welcome to the MySQL monitor.  Commands end with ; or \g.
Your MySQL connection id is 8
Server version: 8.0.44 MySQL Community Server - GPL

Copyright (c) 2000, 2025, Oracle and/or its affiliates.

Oracle is a registered trademark of Oracle Corporation and/or its
affiliates. Other names may be trademarks of their respective
owners.

Type 'help;' or '\h' for help. Type '\c' to clear the current input statement.

mysql> use appdb;
Reading table information for completion of table and column names
You can turn off this feature to get a quicker startup with -A

Database changed
mysql> show tables;
+-----------------+
| Tables_in_appdb |
+-----------------+
| users           |
+-----------------+
1 row in set (0.01 sec)

mysql> select * from users;
+----+----------+------------------+---------------------+
| id | username | email            | created_at          |
+----+----------+------------------+---------------------+
|  1 | testuser | test@example.com | 2025-11-18 05:38:31 |
+----+----------+------------------+---------------------+
1 row in set (0.00 sec)

mysql>
到这里,自定义 MySQL 镜像就结束了,你可以根据需要修改 Containerfile。

 川公网安备51010802032098