和学习其他技术一样,我们同样以一个简单的 Spring Security 示例入手,介绍如何搭建 Spring Security 的环境。以下是搭建 Spring Security 入门项目的详细步骤,本示例将使用 Spring Boot 来简化配置过程。
创建 Spring Boot 项目
你可以通过以下两种方式创建 Spring Boot 项目:
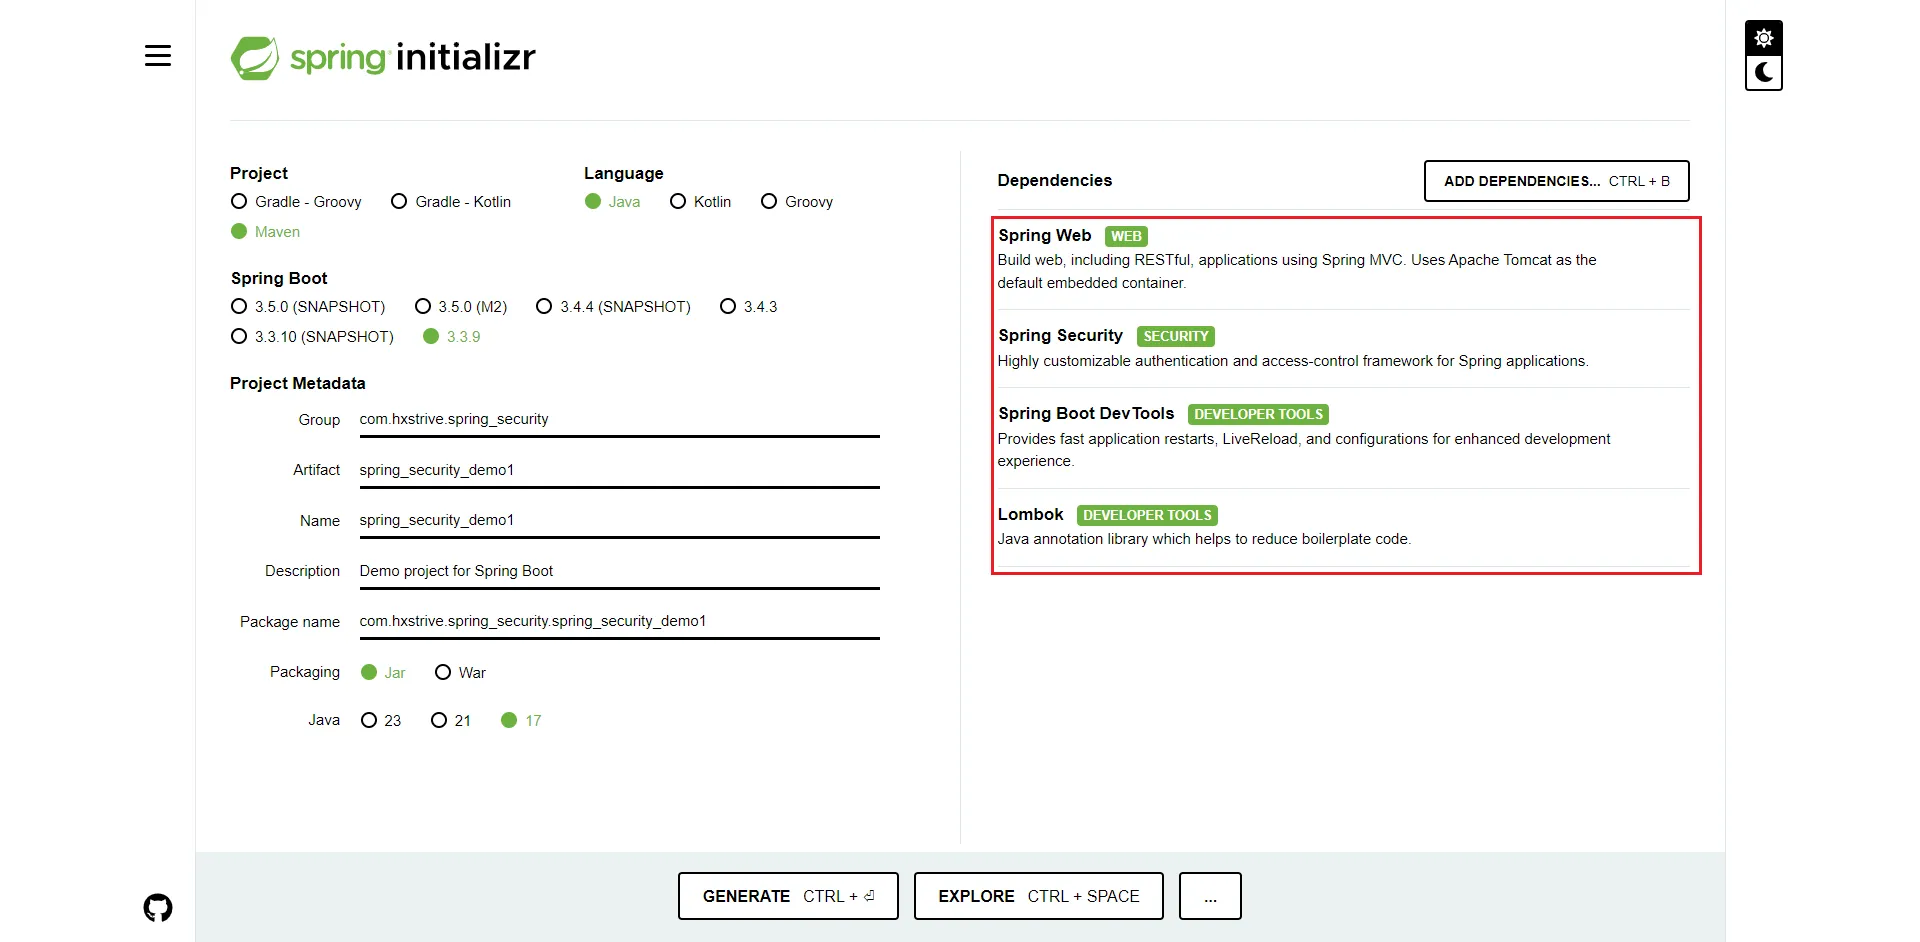
方式一:使用 Spring Initializr
如下图:
方式二:使用 IDE 创建
如果你使用的是 IntelliJ IDEA 或 Eclipse 等 IDE,可以直接在 IDE 中创建 Spring Boot 项目,并在创建过程中添加 “Spring Web” 和 “Spring Security” 依赖,具体操作不再赘述。
spring 广告位
项目结构和依赖
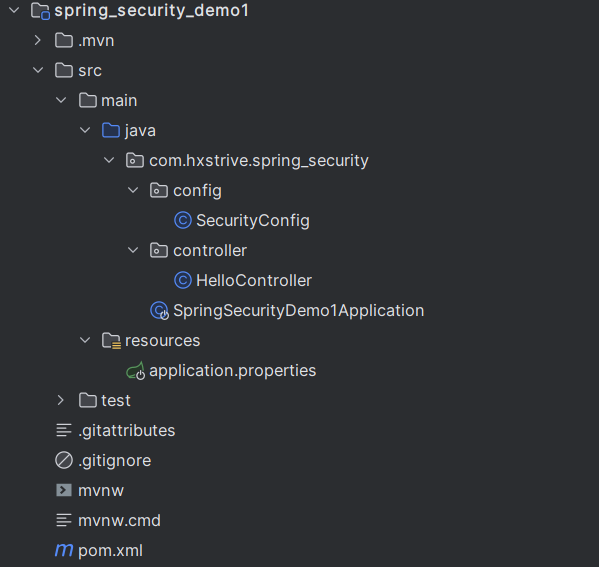
项目创建完成后,目录结构如下图:
完整的 pom.xml 文件内容如下:
<?xml version="1.0" encoding="UTF-8"?>
<project xmlns="http://maven.apache.org/POM/4.0.0"
    xmlns:xsi="http://www.w3.org/2001/XMLSchema-instance"
    xsi:schemaLocation="http://maven.apache.org/POM/4.0.0 https://maven.apache.org/xsd/maven-4.0.0.xsd">
    <modelVersion>4.0.0</modelVersion>
    <parent>
       <groupId>org.springframework.boot</groupId>
       <artifactId>spring-boot-starter-parent</artifactId>
       <version>3.3.9</version>
       <relativePath/> <!-- lookup parent from repository -->
    </parent>
    <groupId>com.hxstrive.spring_security</groupId>
    <artifactId>spring_security_demo1</artifactId>
    <version>0.0.1-SNAPSHOT</version>
    <name>spring_security_demo1</name>
    <description>Demo project for Spring Boot</description>

    <properties>
       <java.version>17</java.version>
    </properties>

    <dependencies>
       <!-- spring security 依赖 -->
       <dependency>
          <groupId>org.springframework.boot</groupId>
          <artifactId>spring-boot-starter-security</artifactId>
       </dependency>
       <!-- spring web 依赖 -->
       <dependency>
          <groupId>org.springframework.boot</groupId>
          <artifactId>spring-boot-starter-web</artifactId>
       </dependency>

       <dependency>
          <groupId>org.springframework.boot</groupId>
          <artifactId>spring-boot-devtools</artifactId>
          <scope>runtime</scope>
          <optional>true</optional>
       </dependency>
       <dependency>
          <groupId>org.projectlombok</groupId>
          <artifactId>lombok</artifactId>
          <optional>true</optional>
       </dependency>
       <dependency>
          <groupId>org.springframework.boot</groupId>
          <artifactId>spring-boot-starter-test</artifactId>
          <scope>test</scope>
       </dependency>
       <dependency>
          <groupId>org.springframework.security</groupId>
          <artifactId>spring-security-test</artifactId>
          <scope>test</scope>
       </dependency>
    </dependencies>

    <build>
       <plugins>
          <plugin>
             <groupId>org.apache.maven.plugins</groupId>
             <artifactId>maven-compiler-plugin</artifactId>
             <configuration>
                <annotationProcessorPaths>
                   <path>
                      <groupId>org.projectlombok</groupId>
                      <artifactId>lombok</artifactId>
                   </path>
                </annotationProcessorPaths>
             </configuration>
          </plugin>
          <plugin>
             <groupId>org.springframework.boot</groupId>
             <artifactId>spring-boot-maven-plugin</artifactId>
             <configuration>
                <excludes>
                   <exclude>
                      <groupId>org.projectlombok</groupId>
                      <artifactId>lombok</artifactId>
                   </exclude>
                </excludes>
             </configuration>
          </plugin>
       </plugins>
    </build>

</project>
创建一个简单的控制器
在 src/main/java 目录下创建一个控制器类,用于处理 HTTP 请求。例如:
package com.hxstrive.spring_security.controller;

import org.springframework.web.bind.annotation.GetMapping;
import org.springframework.web.bind.annotation.RestController;

/**
 * 简单控制器
 * @author hxstrive.com
 */
@RestController
public class HelloController {

    @GetMapping("/hello")
    public String hello() {
        return "Hello, Spring Security!";
    }

}
配置 Spring Security
在 src/main/java 目录下创建一个配置类,用于配置 Spring Security。示例如下:
package com.hxstrive.spring_security.config;

import org.springframework.context.annotation.Bean;
import org.springframework.context.annotation.Configuration;
import org.springframework.security.config.annotation.web.builders.HttpSecurity;
import org.springframework.security.config.annotation.web.configurers.AbstractAuthenticationFilterConfigurer;
import org.springframework.security.web.SecurityFilterChain;

import static org.springframework.security.config.Customizer.withDefaults;

/**
 * Spring Security 配置类
 * @author hxstrive.com
 */
@Configuration
public class SecurityConfig {

    @Bean
    public SecurityFilterChain securityFilterChain(HttpSecurity http) throws Exception {
        // 已废弃,不再推荐使用
        //http.authorizeRequests()
        //       .anyRequest().authenticated()
        //       .and().formLogin()
        //       .and().httpBasic();
        //return http.build();

        // 推荐使用如下方式
        // authorizeHttpRequests 替代了旧的 authorizeRequests 方法。
        // 它接受一个 Consumer<AuthorizeHttpRequestsConfigurer<HttpSecurity>.AuthorizationManagerRequestMatcherRegistry> 类型的参数,
        // 使用 Lambda 表达式来配置请求的授权规则。
        // anyRequest().authenticated() 表示所有的请求都需要进行身份验证。
        http.authorizeHttpRequests(authorize -> authorize.anyRequest().authenticated())
                // formLogin 方法
                // 用于配置表单登录功能。同样接受一个 Consumer<FormLoginConfigurer<HttpSecurity>> 类型的参数。
                // permitAll() 表示允许所有用户访问表单登录相关的页面,例如登录页面、登录处理接口等。
                // 你还可以根据需求进行更多的配置,如自定义登录页面的 URL、登录成功或失败的处理逻辑等。
                .formLogin(AbstractAuthenticationFilterConfigurer::permitAll)
                // 用于启用 HTTP 基本认证,withDefaults() 表示使用默认的 HTTP 基本认证配置。
                .httpBasic(withDefaults());

        return http.build();
    }

}
上述配置的含义如下:
http.authorizeHttpRequests(authorize -> authorize.anyRequest().authenticated())
说明:
authorizeHttpRequests() 用于开启对 HTTP 请求的授权配置。
authorize -> authorize.anyRequest().authenticated() 是一个 Lambda 表达式,其中 authorize 是 AuthorizeHttpRequestsConfigurer 类型的对象。anyRequest() 表示匹配所有的 HTTP 请求,authenticated() 表示要求所有匹配的请求都必须经过身份验证才能访问。也就是说,无论用户访问应用程序的哪个 URL,都需要先登录。
.formLogin(AbstractAuthenticationFilterConfigurer::permitAll)
说明:
formLogin() 开启表单登录功能。Spring Security 会默认提供一个简单的登录页面,用户可以通过该页面输入用户名和密码进行登录。
AbstractAuthenticationFilterConfigurer::permitAll() 使用方法引用,允许所有用户访问登录页面。这样,即使是未经过身份验证的用户也可以访问登录页面,避免出现循环重定向的问题。
.httpBasic(withDefaults());
说明:
withDefaults() 使用默认的 HTTP 基本认证配置。
return http.build();
spring 广告位
运行项目
在 IDE 中运行 Spring Boot 应用程序的主类(通常是带有 @SpringBootApplication 注解的类),如下图:
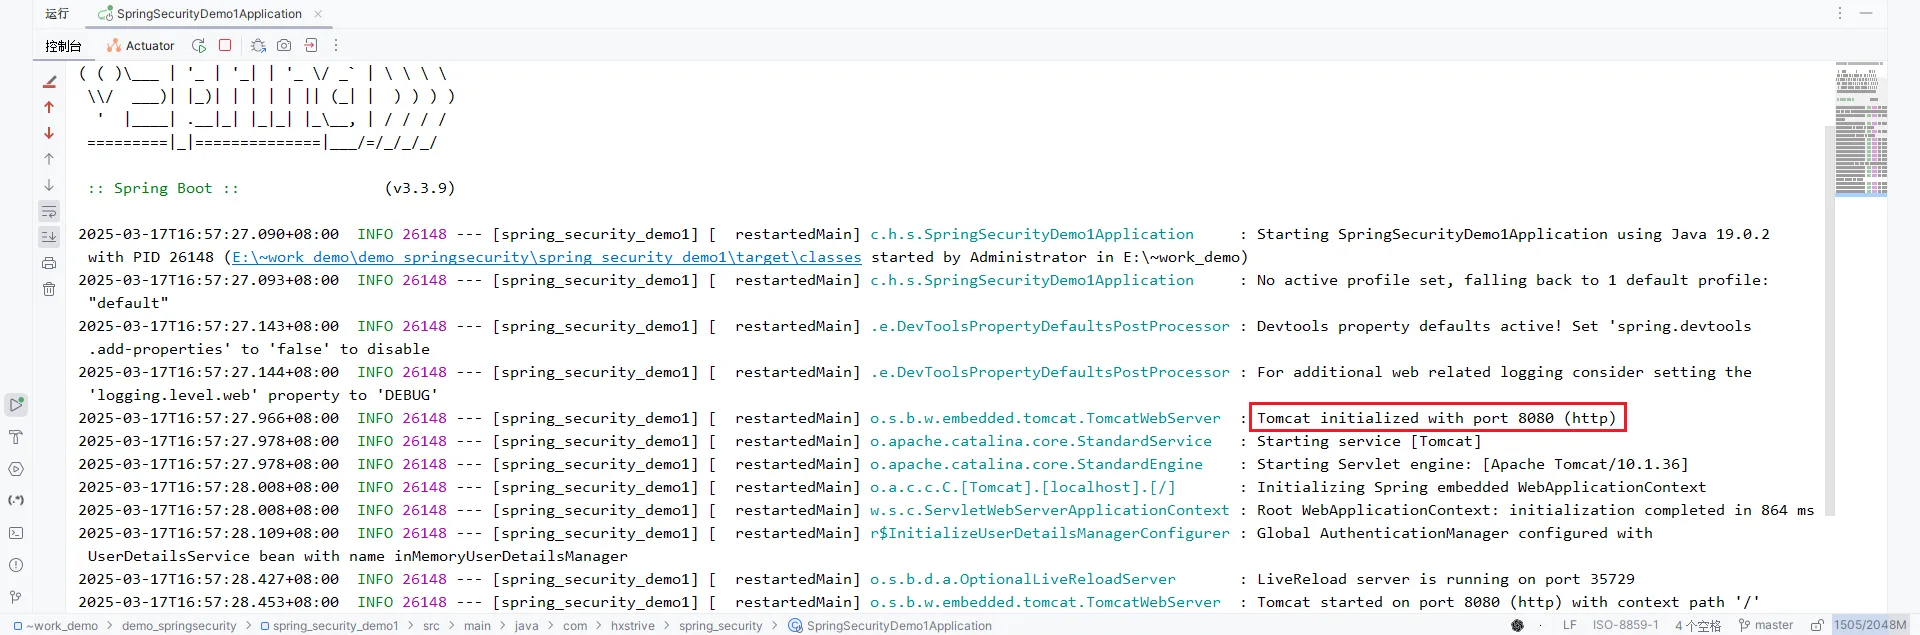
项目启动成功,端口为 8080。
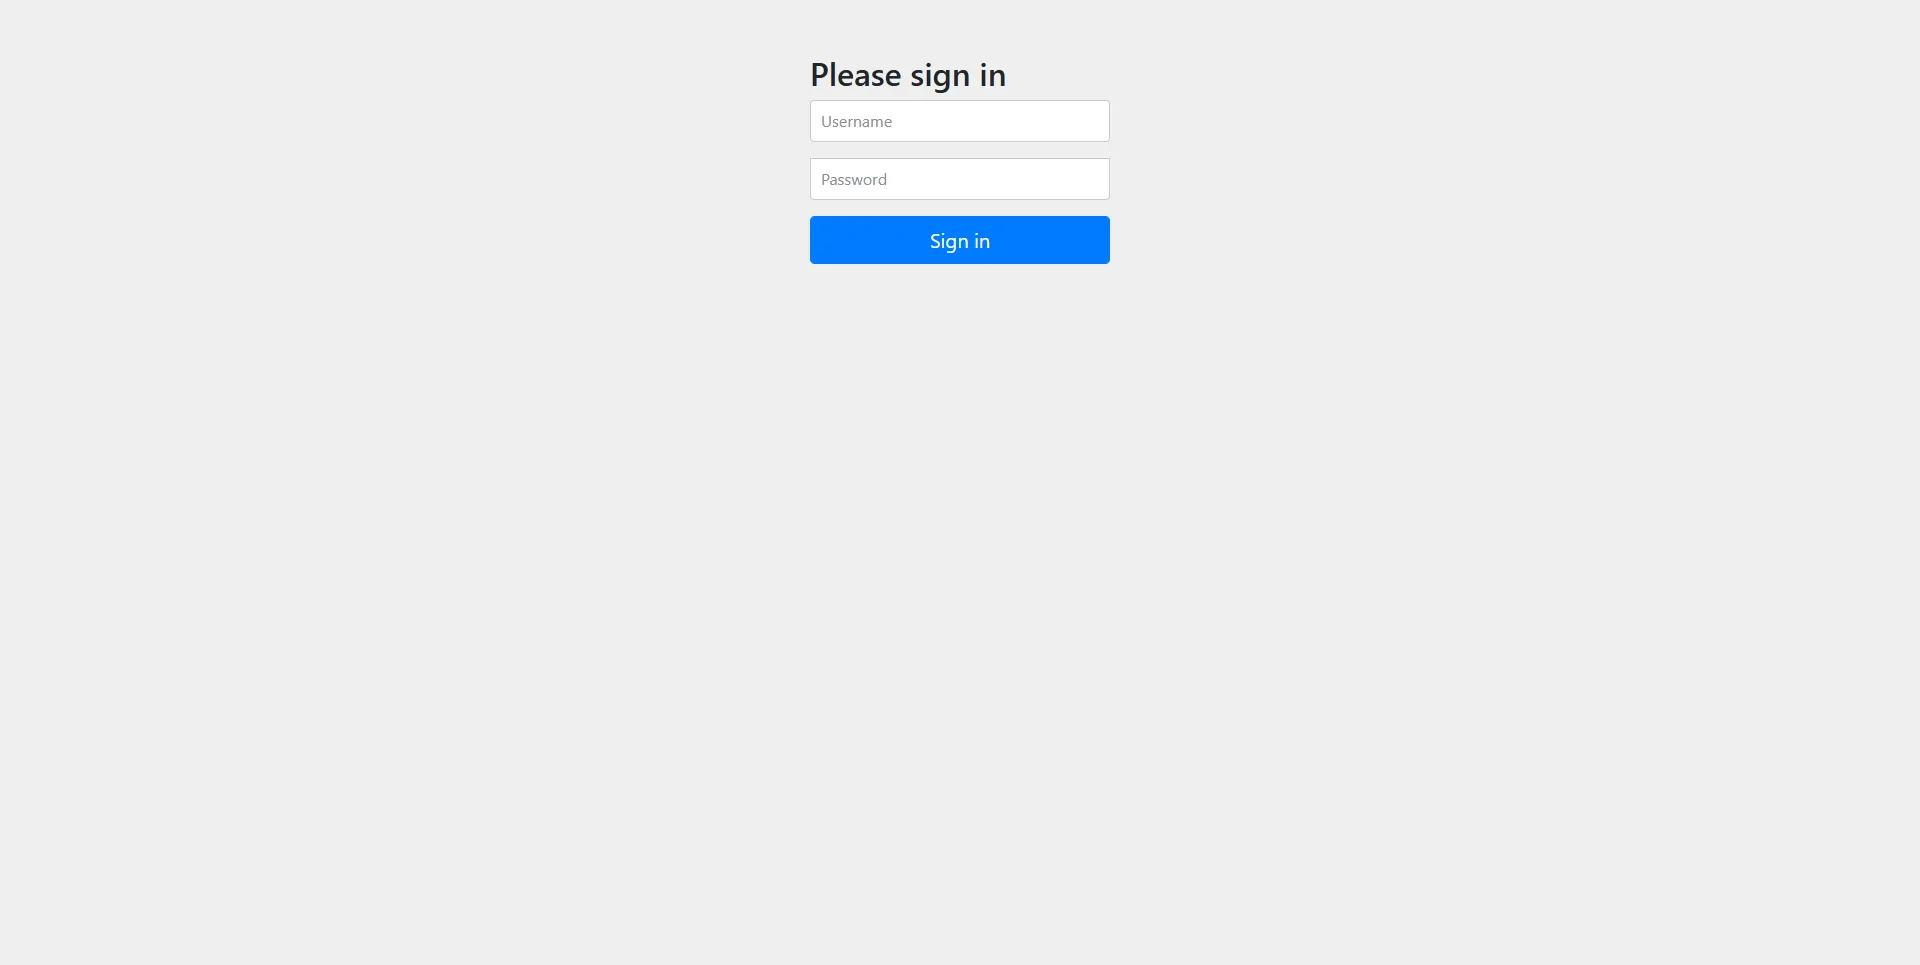
测试应用
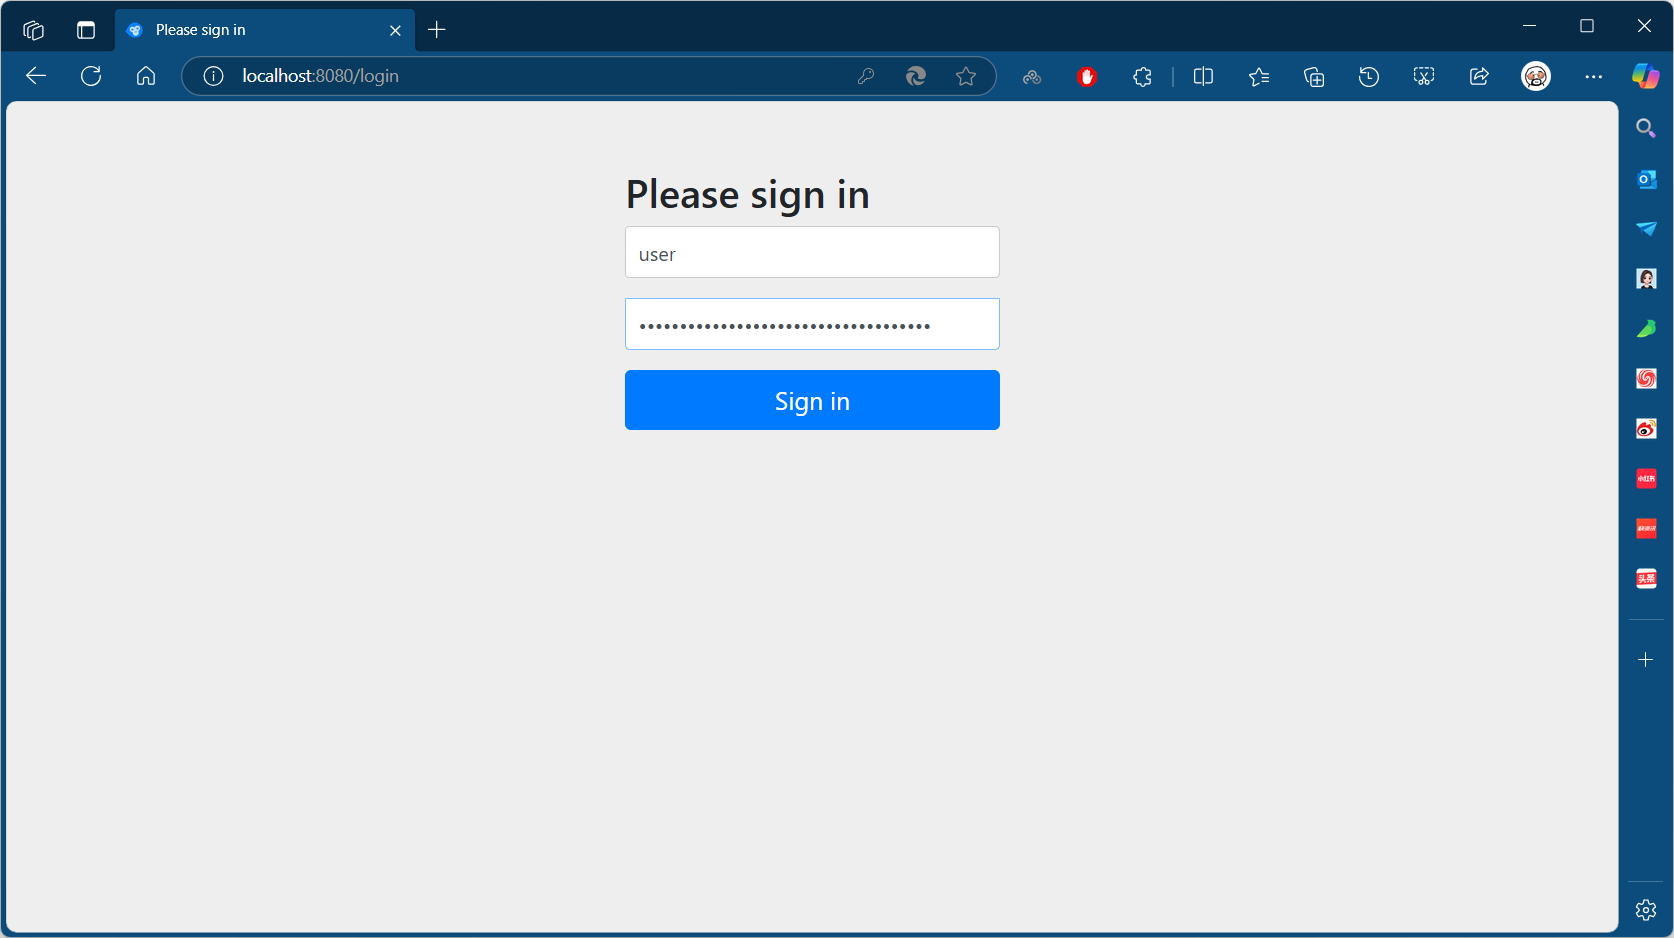
打开浏览器,访问 http://localhost:8080/hello 地址,由于所有请求都需要身份验证,你会看到一个登录页面,如下图:
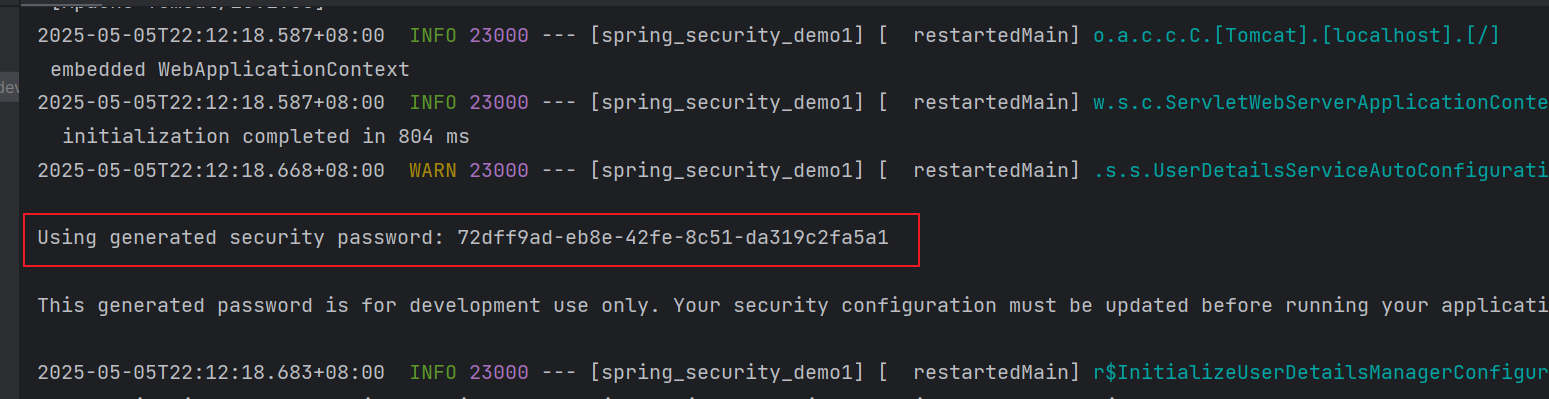
注意,Spring Security 默认用户名为 user,并且会在启动时会生成一个随机密码,你可以在控制台日志中找到类似下图中的信息:
使用该用户名和随机密码进行登录,如下图:
登录成功后,你将看到如下图信息:

走到这里,恭喜,已经成功搭建好 Spring Security 环境!
📢 注意,后续章节均将在该示例的基础之上进行开发,如果没有特殊需要,后续章节将不再给出 pom.xml 等文件内容。

 川公网安备51010802032098