Spring Security 的权限管理核心是通过 HttpSecurity 配置请求授权规则,结合用户认证与角色权限控制访问。例如:
@Bean
public SecurityFilterChain securityFilterChain(HttpSecurity http) throws Exception {
    System.out.println("securityFilterChain()");
    // csrfCustomizer.ignoringRequestMatchers(*) 表示所有请求地址都不使用 csrf
    http.csrf(csrfCustomizer -> csrfCustomizer.ignoringRequestMatchers("*"))
            // authorize.anyRequest().authenticated() 表示所有的请求都需要进行身份验证。
            .authorizeHttpRequests(authorize -> authorize
                            .requestMatchers("/sys/**").hasRole("admin")
                            .anyRequest().authenticated()
            )
            // ...
            .httpBasic(withDefaults());

    return http.build();
}
上述示例中,以 /sys/ 开头的请求地址,需要拥有“admin”角色权限才能访问。并且,非 /sys/ 开头的请求必须要鉴权后才能访问。在 Spring Security 中,提供了多种内置控制方法,如 permitAll()、authenticated()、hasRole() 等等。
注意:这些方法的底层都是基于 access() 进行实现的。下面将逐一详细介绍:
permitAll() 允许所有访问
permitAll() 表示所匹配的 URL 允许所有用户(包括匿名用户)访问,常用于公开资源、登录页、静态文件等无需权限的接口。例如:
http.authorizeHttpRequests(authorize -> authorize
    .requestMatchers("/public/**", "/login", "/register").permitAll()
    .anyRequest().authenticated() // 其他请求需认证
);
上述代码表示 /public/ 开头、/login、/register 地址任何人都可以访问,其他地址需要认证通过后才能访问。permitAll() 方法源码如下:
public AuthorizeHttpRequestsConfigurer<H>.AuthorizationManagerRequestMatcherRegistry permitAll() {
    return this.access(AuthorizeHttpRequestsConfigurer.permitAllAuthorizationManager);
}

static final AuthorizationManager<RequestAuthorizationContext> permitAllAuthorizationManager = (a, o) -> {
    return new AuthorizationDecision(true);
};
注意事项:
(1)路径匹配顺序,Spring Security 按声明顺序匹配路径,因此 permitAll() 需放在正确位置:
// 错误示例:先匹配了 /sys/**,导致 permitAll() 生效,
// 后面的 hasRole() 失效,最后 /sys/add 和 /sys/update 等不需要 admin 角色也能访问
http.authorizeHttpRequests(authorize -> authorize
        .requestMatchers("/sys/**").permitAll()
        .requestMatchers("/sys/add", "/sys/update", "/sys/delete").hasRole("admin")
        .anyRequest().authenticated()
)

// 正确示例:精确路径优先,再匹配宽泛路径
http.authorizeHttpRequests(authorize -> authorize
        .requestMatchers("/sys/add", "/sys/update", "/sys/delete").hasRole("admin")
        .requestMatchers("/sys/**").permitAll()
        .anyRequest().authenticated() // 其他请求需认证
)
(2)与 CSRF 的关系,若路径包含 POST/PUT/DELETE 请求,需确保 CSRF 配置正确(例如登录接口通常需禁用 CSRF):
http.csrf(csrf -> csrf
    .ignoringRequestMatchers("/login", "/api/public/**") // 公开接口忽略 CSRF
);
spring 广告位
authenticated() 访问需要认证
authenticated() 能够限制访问权限,只有那些已经成功通过认证的用户,才可以访问与之匹配的路径。这里所说的认证方式有多种,像表单登录、HTTP Basic 认证、OAuth2 认证等都包含在内。例如:
http.authorizeHttpRequests(authorize -> authorize
    .requestMatchers("/user/**").authenticated() // 只有已认证用户能访问 /user 路径
    .anyRequest().permitAll() // 其他路径允许所有访问
);
上述代码中,只有登录成功的用户才能访问 /user 路径及子路径。
authenticated() 源码如下:
public AuthorizeHttpRequestsConfigurer<H>.AuthorizationManagerRequestMatcherRegistry authenticated() {
    return this.access(AuthenticatedAuthorizationManager.authenticated());
}

/**
 * Creates an instance of {@link AuthenticatedAuthorizationManager}.
 * @param <T> the type of object being authorized
 * @return the new instance
 */
public static <T> AuthenticatedAuthorizationManager<T> authenticated() {
    return new AuthenticatedAuthorizationManager<>();
}
注意,authenticated() 使用的典型应用场景如下:
(1)用户个人中心:用户的个人信息页面、订单历史记录等,都需要用户登录之后才能查看。
.requestMatchers("/profile/**", "/orders/**").authenticated()
(2)需授权才能使用的 API:对于一些需要用户拥有相应权限才能调用的 API 接口,可进行如下配置。
.requestMatchers("/api/private/**").authenticated()
(3)整站访问限制:若希望整个网站都只对已认证用户开放,可采用以下配置方式。
.anyRequest().authenticated()
anonymous() 匿名用户访问
anonymous() 允许未登录的用户(即匿名用户)访问匹配的路径,而已认证用户访问时会被拒绝。
与 permitAll() 的区别:
示例:
http.authorizeHttpRequests(authorize -> authorize
        // 匿名用户可以访问 /sys/get 和 /user/get 两个接口,已经登录的用户不能访问
        .requestMatchers("/sys/get", "/user/get").anonymous()
        .anyRequest().authenticated() // 其他请求需认证
)
anonymous() 源码如下:
public AuthorizeHttpRequestsConfigurer<H>.AuthorizationManagerRequestMatcherRegistry anonymous() {
    return this.access(AuthenticatedAuthorizationManager.anonymous());
}

/**
 * Creates an instance of {@link AuthenticatedAuthorizationManager} that determines if
 * the {@link Authentication} is anonymous.
 * @param <T> the type of object being authorized
 * @return the new instance
 * @since 5.8
 */
public static <T> AuthenticatedAuthorizationManager<T> anonymous() {
    return new AuthenticatedAuthorizationManager<>(new AnonymousAuthorizationStrategy());
}
anonymous() 的应用场景:
(1)登录与注册页面,确保已登录用户无法访问登录页,避免重复登录。
.requestMatchers("/login", "/logout", "/register").anonymous()
(2)公开 API 端点,部分 API 允许匿名调用,但已认证用户可能有不同权限。
.requestMatchers("/api/public/**").anonymous()
(3)静态资源,某些静态资源仅对未登录用户可见(如欢迎页)。
.requestMatchers("/welcome.html", "/anonymous.css").anonymous()
denyAll() 拒绝所有访问
denyAll() 表示所匹配的 URL 都不允许被访问,即便用户已经通过认证或者拥有特定角色,也无法访问这些路径。此方法常用于以下情形:
临时禁用某些接口或者页面。
防止对敏感路径的意外访问。
在开发或测试环境中限制特定路径的访问。
示例:
http.authorizeHttpRequests(authorize -> authorize
    .requestMatchers("/sys/**").denyAll() // 拒绝所有对 /sys 路径的访问
    .anyRequest().permitAll() // 其他路径允许访问
)
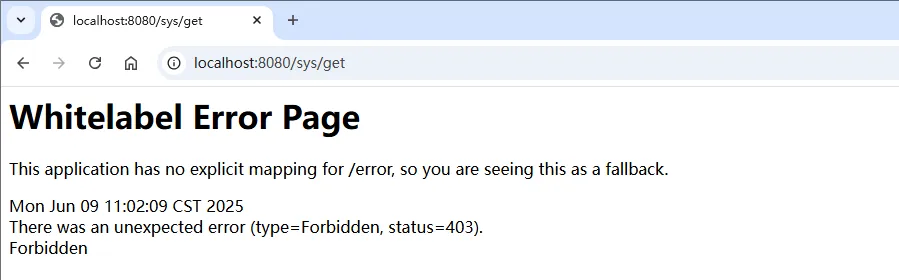
如果用户未被认证需要认证,如果已经认证,报403,如下图:
方法源码如下:
public AuthorizeHttpRequestsConfigurer<H>.AuthorizationManagerRequestMatcherRegistry denyAll() {
    return this.access((a, o) -> {
        return new AuthorizationDecision(false);
    });
}
spring 广告位
rememberMe() 允许“记住我”访问
rememberMe() 用于指定哪些路径允许通过 remember-me 令牌认证的用户访问。
与 authenticated() 的区别:
示例:
http.authorizeHttpRequests(authorize -> authorize
        .requestMatchers("/sys/**").rememberMe() // 允许记住密码的用户访问 /sys 路径的请求
        .anyRequest().authenticated() // 其他请求需认证
)
源码如下:
public AuthorizeHttpRequestsConfigurer<H>.AuthorizationManagerRequestMatcherRegistry rememberMe() {
    return this.access(AuthenticatedAuthorizationManager.rememberMe());
}

/**
 * Creates an instance of {@link AuthenticatedAuthorizationManager} that determines if
 * the {@link Authentication} is authenticated using remember me.
 * @param <T> the type of object being authorized
 * @return the new instance
 * @since 5.8
 */
public static <T> AuthenticatedAuthorizationManager<T> rememberMe() {
    return new AuthenticatedAuthorizationManager<>(new RememberMeAuthorizationStrategy());
}
fullyAuthenticated() 允许非“记住我”访问
fullyAuthenticated() 用于限制路径访问,仅允许通过常规登录方式(如表单登录、OAuth2 登录)认证的用户访问,而通过 remember-me 功能自动登录的用户会被拒绝。
典型场景:
示例:
http.authorizeHttpRequests(authorize -> authorize
        // 需要完全认证才能访问 /sys 路径的请求,RememberMe 方式不可以访问
        .requestMatchers("/sys/**").fullyAuthenticated()
        .anyRequest().authenticated() // 其他请求需认证
)
源码如下:
public AuthorizeHttpRequestsConfigurer<H>.AuthorizationManagerRequestMatcherRegistry fullyAuthenticated() {
    return this.access(AuthenticatedAuthorizationManager.fullyAuthenticated());
}

/**
 * Creates an instance of {@link AuthenticatedAuthorizationManager} that determines if
 * the {@link Authentication} is authenticated without using remember me.
 * @param <T> the type of object being authorized
 * @return the new instance
 * @since 5.8
 */
public static <T> AuthenticatedAuthorizationManager<T> fullyAuthenticated() {
    return new AuthenticatedAuthorizationManager<>(new FullyAuthenticatedAuthorizationStrategy());
}
到这里我们已经将 Spring Security 中几个基础的权限方法进行了介绍,实际项目中可以根据自己的需要灵活使用这些方法,达到预期效果。

 川公网安备51010802032098